

Required permission:
- View task
- Create task (new tasks) or Edit task (existing tasks)
- add several entries with the same structure,
- fill in different data for each entry,
- see how complete each entry is,
- edit or delete entries.
- several delivery recipients,
- inspecting several items,
- signatures from several people,
- data at several service checkpoints.
Add entries
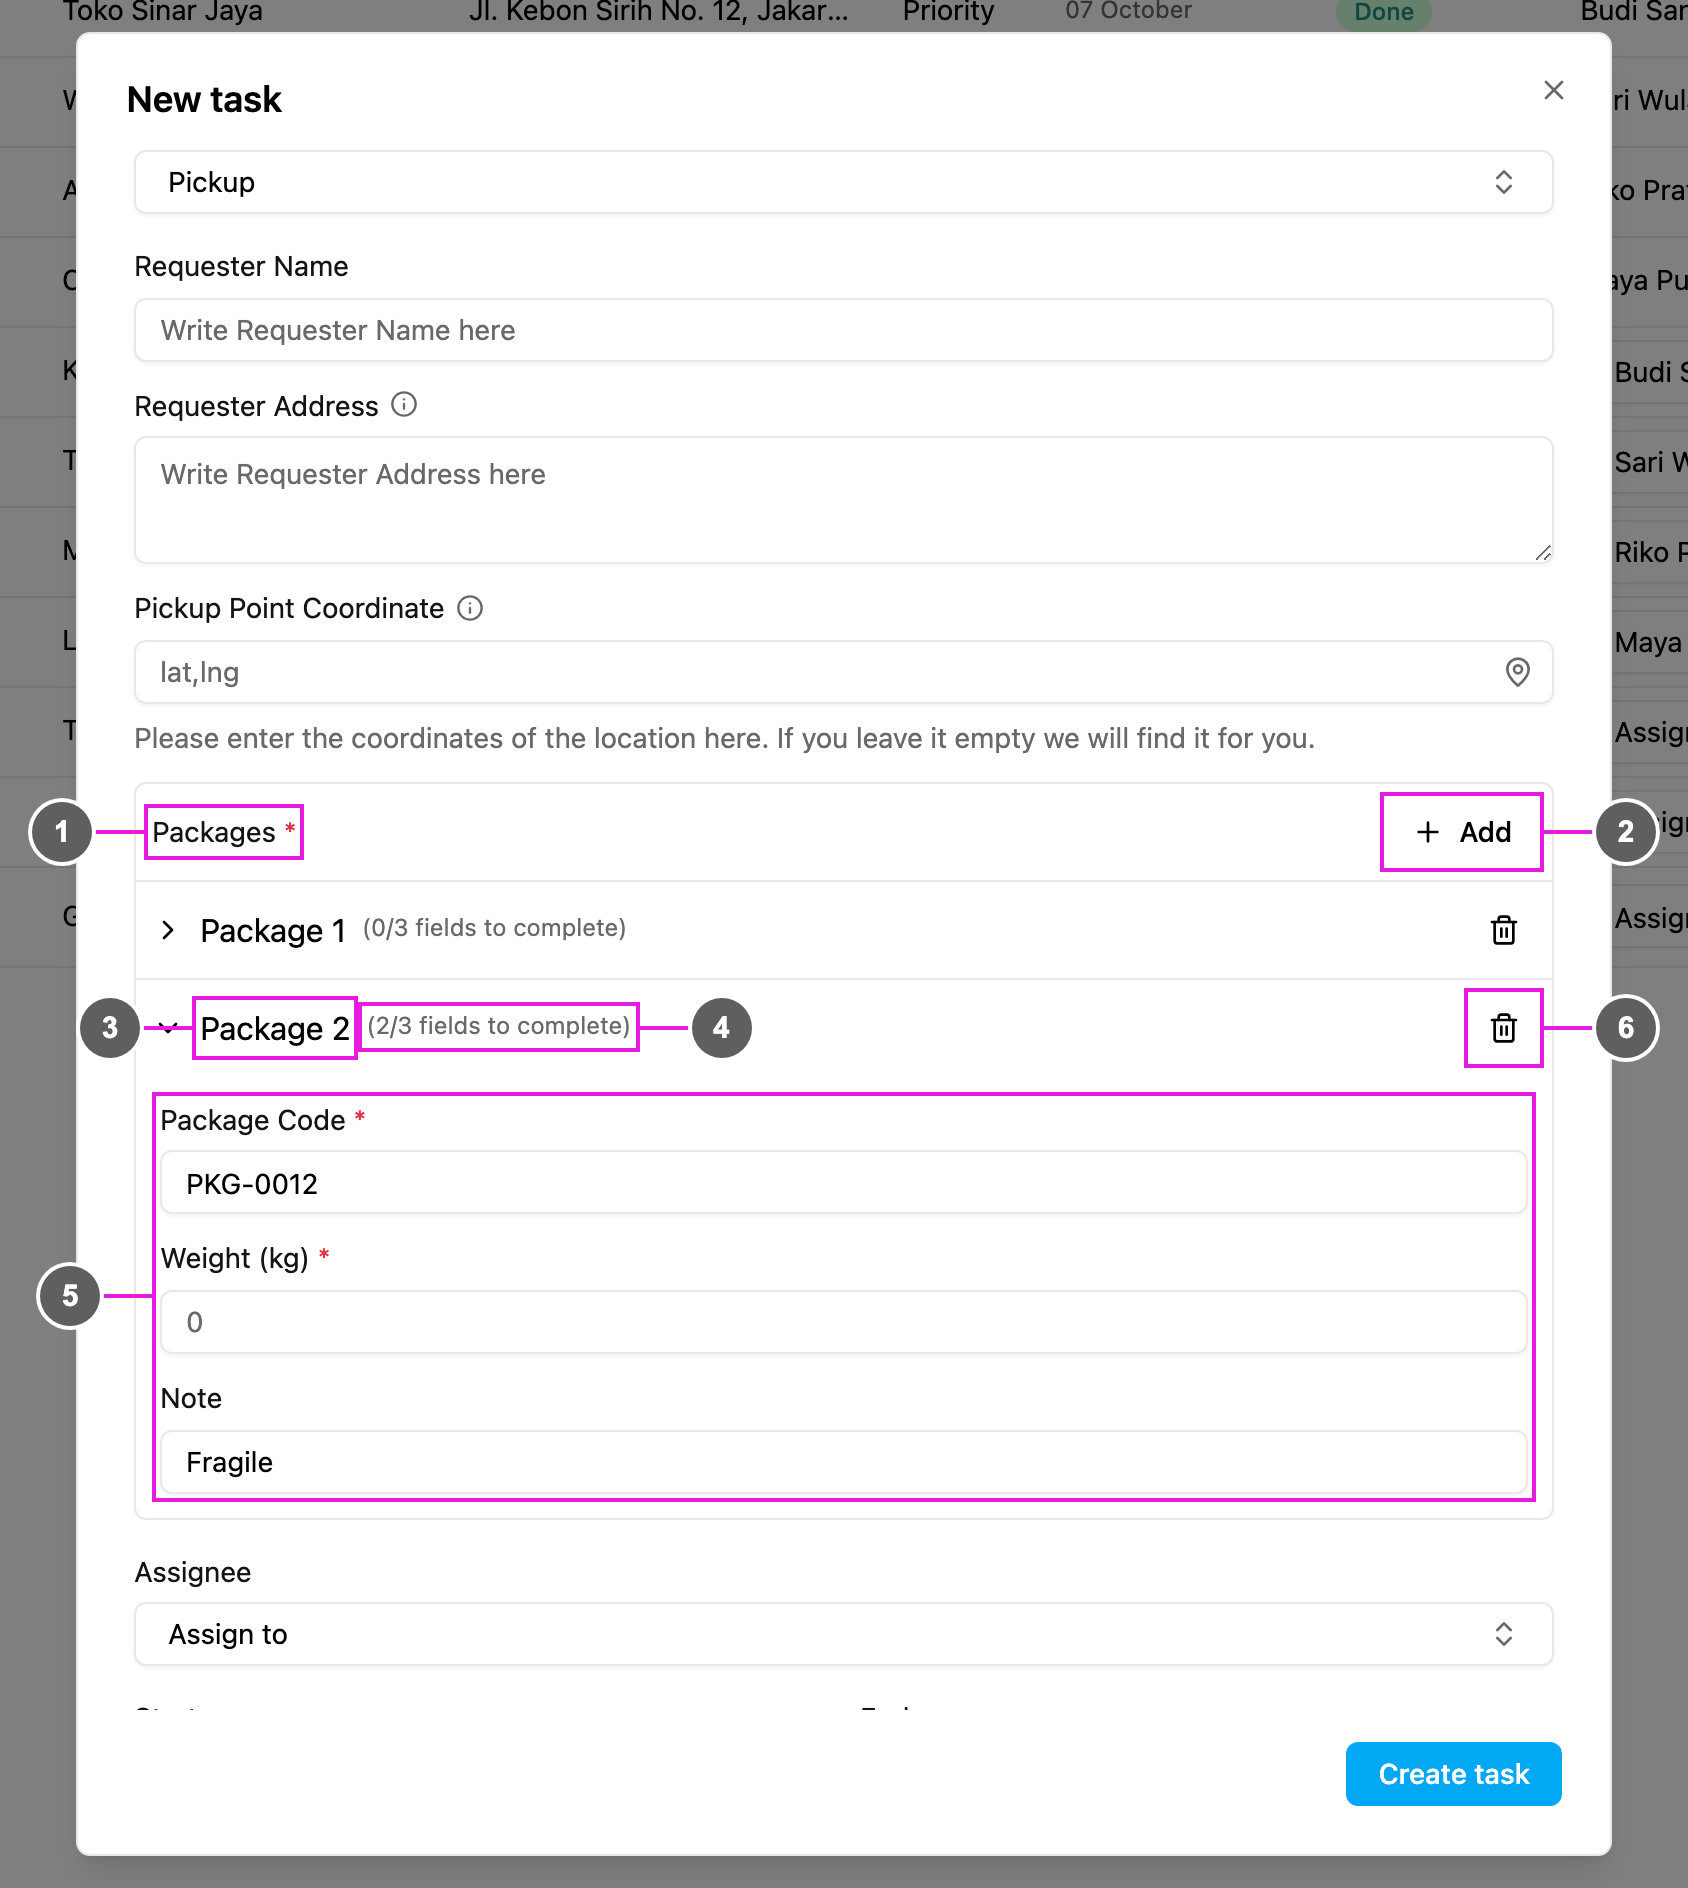
- Subpage card: the subpage’s title, from the task type. Before any entry is added it says “No entries yet. Click Add to start.”
- Add: add an entry. Click it again for each further entry.
- Entry: each entry is numbered and named with the subpage’s subtitle, for example Package 1. Click it to open or close it.
- Progress: how many of the entry’s fields are filled in, for example (1/3 fields to complete).
- Fields: the subpage’s own fields. Fill them in as any other field of the form; required fields must be filled in.
- Delete this entry: remove the entry. Delete this entry? asks to confirm.
Edit entries
Open the task with Task actions › Edit. The subpage shows the task’s entries: open an entry to change its fields, add new entries or delete entries, then click Save.View subpage data on a task
- Open the task with Task actions › View.
- Click More Details.
- Open the Subpage tab. It shows how many entries there are, then every entry with its fields and values.
Checks
- Required subpage: the task cannot be saved without at least one entry. The form shows “Please complete every entry before saving” while an entry is incomplete.
- Optional subpage: the task can be saved with no entries.
- Fields in an entry follow the same rules as everywhere else: required fields, formats, number ranges, minimum and maximum photos, and the minimum and maximum options of a select.
Tips
- Fill in the required fields first, and use the progress counter to see how far each entry is.
- Use default values from the task type when they are offered.
- Review every entry before you save.
- Delete entries you don’t need rather than leaving them empty.
Examples
Multi-stop delivery, subpage Delivery Recipients: add one entry per recipient, fill in their name and phone, add the delivery photo and the signature, then repeat for each stop. Equipment inspection, subpage Equipment Checklist: add one entry per item with its equipment ID, select its condition (Good, Fair, Poor), record the reading, take inspection photos and add notes. Quality control, subpage QC Checkpoints: for each checkpoint, read its criteria, select Pass or Fail, enter the measured value, attach a photo and add remarks.Troubleshooting
The task cannot be saved- A required subpage needs at least one entry.
- Fill in every required field of every entry.
- Fix the messages shown on the fields.
- Check your connection.
- Use a supported image format, such as JPG or PNG, and a file that is not too large.