

Required permission:
- View hub, Create hub (step 1)
- View user, Invite user, View role (step 2)
- View flow, Create flow (step 3)
- View task, Create task, Assign task (step 4)
- View task, Do task (step 6)
1
Create your hubs
A hub is a base your field team works from, such as a warehouse, office, depot or store. Every task, user and vehicle belongs to one or more hubs, so the hub is what keeps the work of each branch apart.You set up your first hub when you sign up. To add more, open Settings › Hub and click New. Give the hub a Name, search its Address, and check the pin on the map. See Hub.
2
Invite your team
Open Settings › User and click Invite. Pick the Hub (or hubs) and the Role, type each email address and press Enter, then send the invitation. Everyone you invite in one go gets the same hubs and role.Give office staff the Admin or Planner role and field workers the Field User role. Each invited person gets an email with a link to set their name and password. See Inviting Users.
3
Design a task type
A task type is the form your field worker fills in, such as a delivery, a pickup or a visit. Open Workflow › Task Type, start from a template such as Delivery or Pickup, and change the fields to match how your team works. See Task Type.
4
Create and assign tasks
Open Activities › Task, click New, choose the task type and fill in the details. Then pick a field worker in the Assignee column. You can also import many tasks from a spreadsheet. See Creating a Task and Assigning a Task.
5
Follow the work
The field worker sees the task on the field app. Follow them on Monitoring › Tracking, and open the task to see what they captured: data, photos and signatures. See Tracking.
6
Finish a task from the web (optional)
You don’t always need the field app. When a task is assigned to you and is Ongoing, you can fill in its pages and finish it from the web app, for example for back-office work or to try out a task type. See Doing a Task on the Web.
Who sees what: hubs
The hub a user belongs to decides which tasks, visits, vehicles and reports they see.- The hub picker at the top of every page lists only the hubs you belong to.
- Lists such as tasks, visits and users show the hub selected in the picker. People without access to a hub never see its data.
- To change a user’s hubs, edit the user on Settings › User. See Managing Users.
Get the field app
Your field team does its work on the field app. To get it, click the ? button in the top bar and choose Download the field app.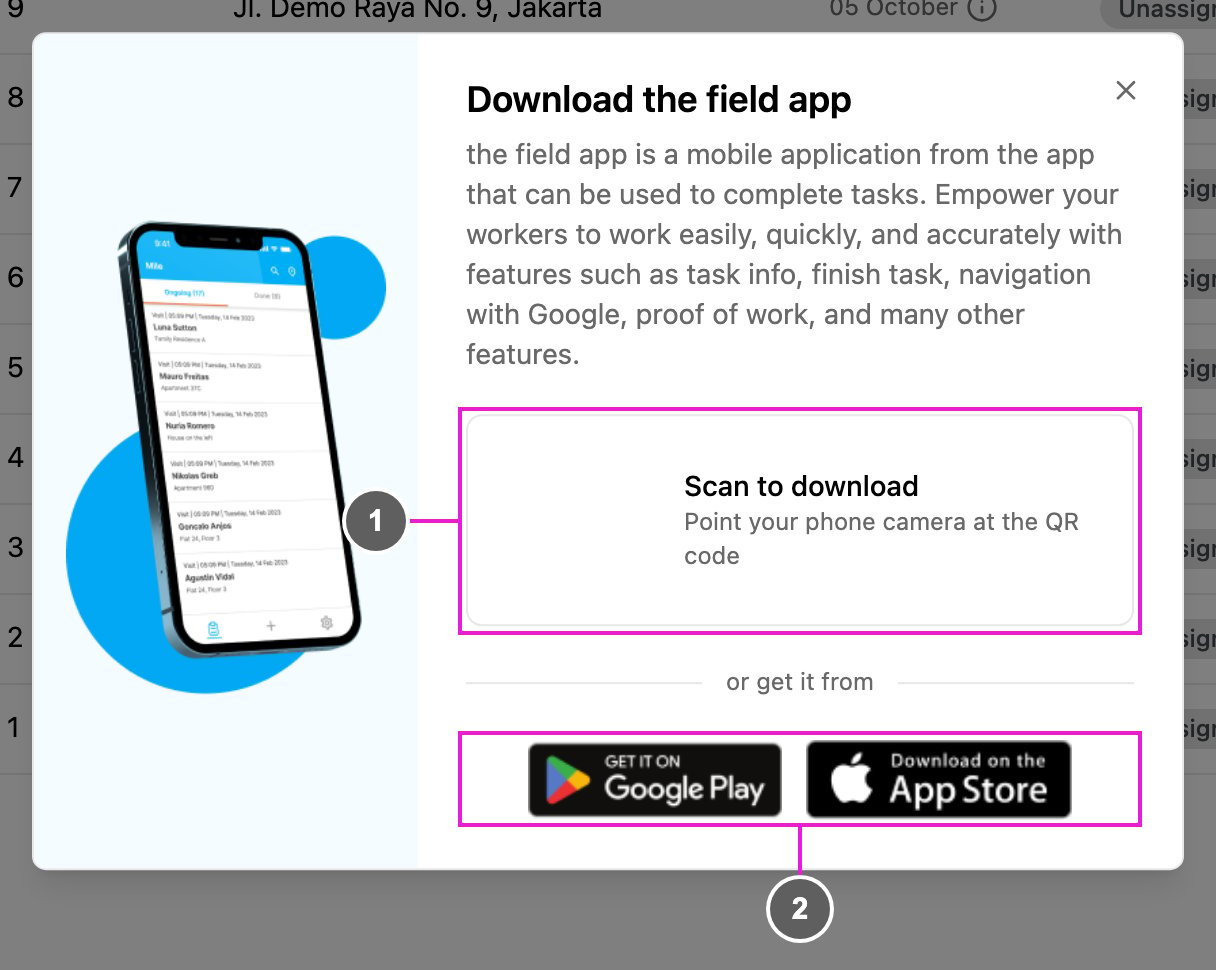
- Scan to download: point the phone’s camera at the QR code to open the store page.
- Google Play and App Store: open the app in the store for Android or iPhone. Share these links with your field team.
Phone requirements
For the field app to run smoothly, phones should meet these requirements.
Allow the field app to use these on the phone:
- Camera: for photo, video and capture fields.
- Location: for tracking and for the coordinates saved with each task.
- Storage: for photos and files the app keeps until they are uploaded.
- Phone: for calling a customer from a task.
Demo data
A new organization starts with a few demo tasks so you can try the app before you add your own. While every task in your hub is a demo task, a DEMO DATA banner shows at the top of every page:- New Task: open Activities › Task and create your first task.
- Delete Demo Data: open Activities › Task and remove the demo tasks.
- Tutorial: open the guided tour below.
Take the tour
Click your initials in the top right corner, then Getting Started. A short set of videos walks you through the main parts of the app. The number next to Getting Started shows how many of the videos you have finished, for example (4/5).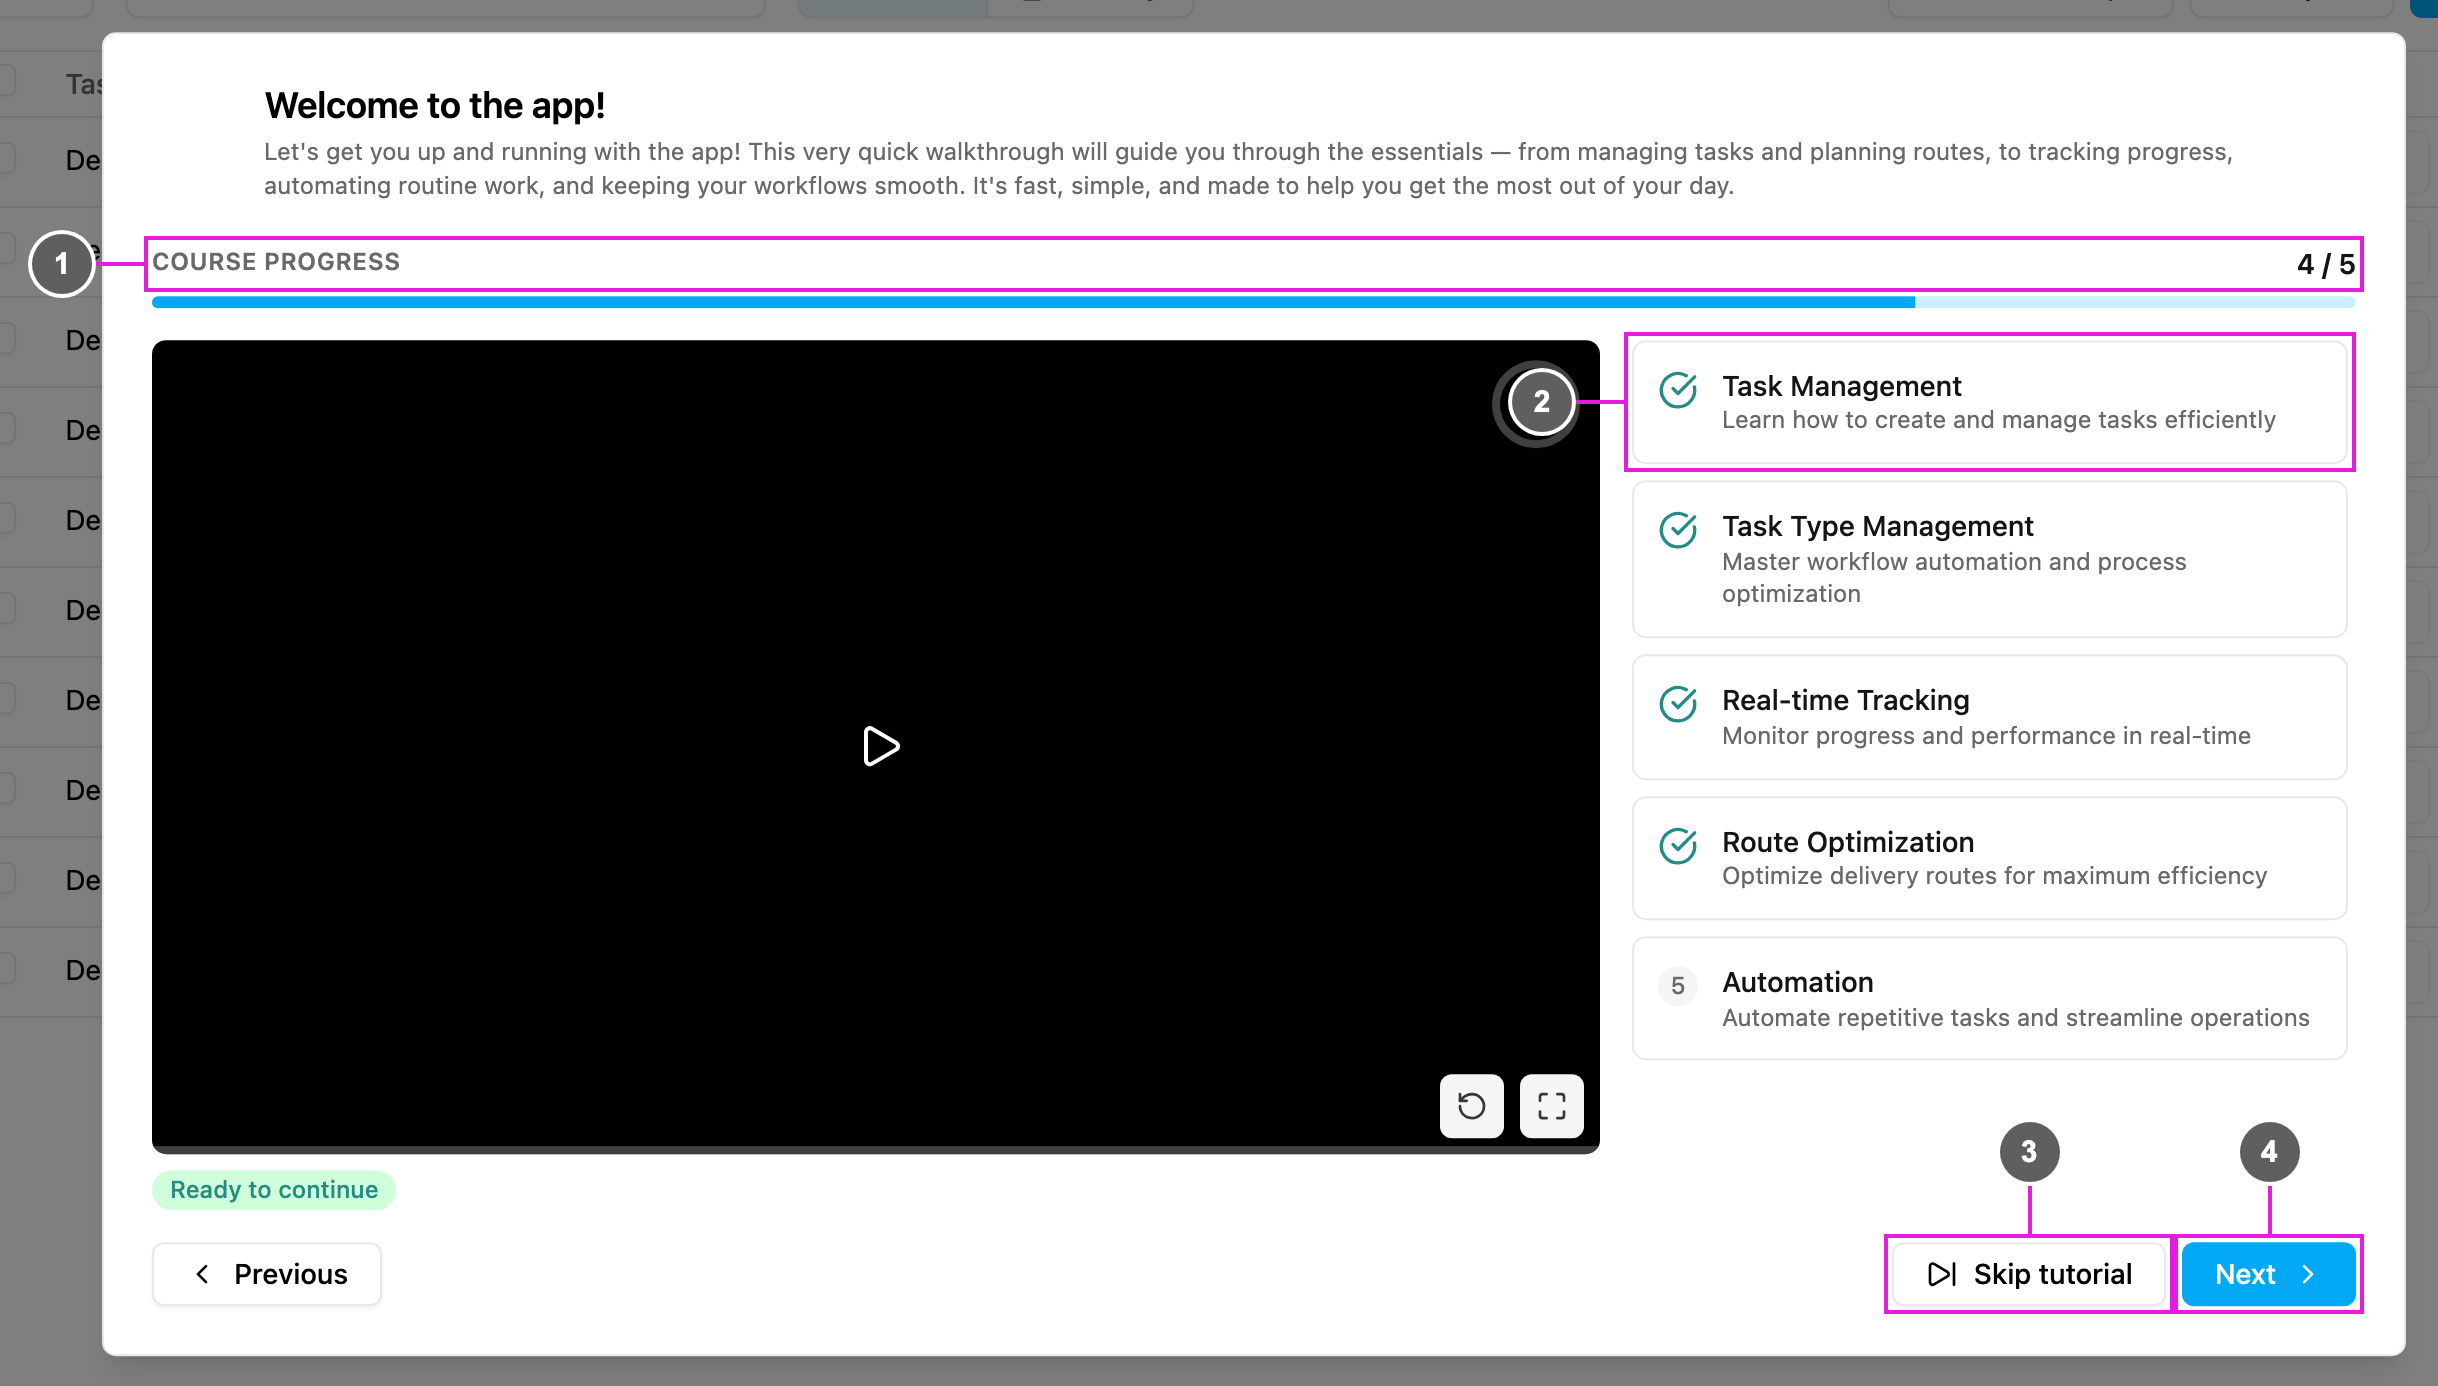
- Course progress: how many videos you have finished.
- Videos: Task Management, Task Type Management, Real-time Tracking, Route Optimization and Automation. A tick marks each one you have watched. Click one to play it.
- Skip tutorial: close the tour. You can open it again at any time from your profile menu.
- Next: go to the next video. Watch the whole video to continue; Previous goes back one. On the last video, click Finish.
What’s next
- Notifications and Help: the bell, the help menu and the assistant.
- Profile: your name, photo, language and organizations.
- Settings: everything about your organization.