

Required permission:
- View vehicle
- Edit vehicle
How maintenance affects optimization
- On the routing date, a vehicle is left out of the optimization when one of its schedules covers that calendar day. The whole day counts, including the first and the last day of the period, and the hours are ignored: a one-hour service on 10 November keeps the vehicle out for all of 10 November.
- A schedule that has already ended stops keeping the vehicle out right away. A service that ends at 13:00 frees the vehicle from 13:00 onward.
- The routing date is the date picked on the Visit page, or today. The vehicle list shows which date it is checking (see Badges and filters).
- Maintenance never changes which vehicles the profile uses. It only hides the vehicle while a schedule applies. When the schedule is over, the vehicle’s Use switch shows on again.
- If every vehicle in the optimization is under maintenance, the optimization doesn’t run and shows: Every vehicle in this request is under maintenance on the routing date. Remove the schedule or force one of them active before optimizing.
- Dates and times are shown in your device’s time zone.
How to use it
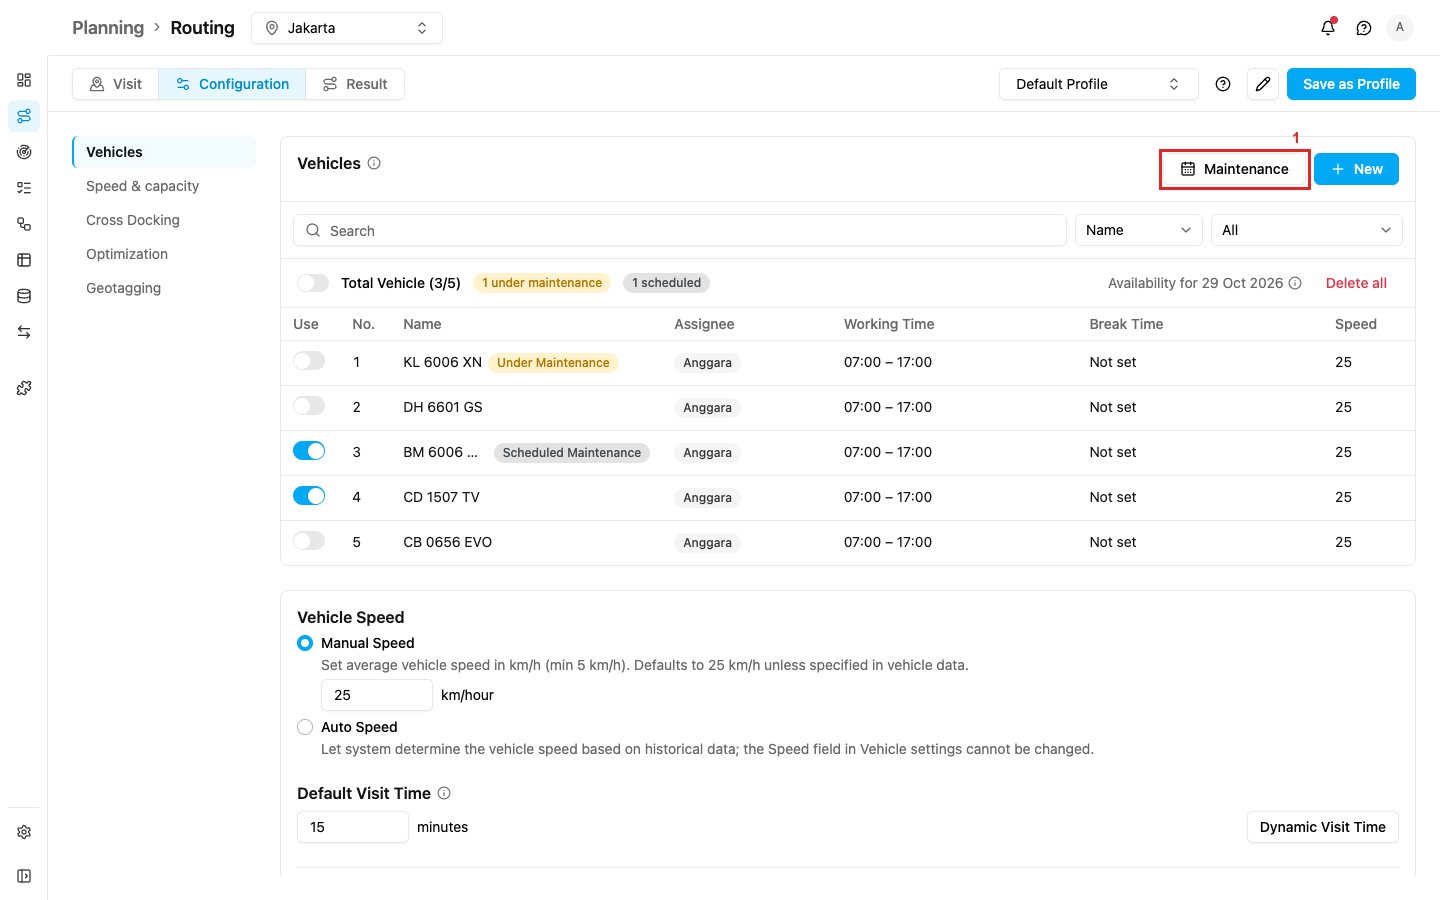
- Open Planning › Routing › Configuration and go to Vehicles.
- Click Maintenance (item 1 in the picture), next to New. The Vehicle Maintenance window opens for all vehicles of the hub.
Adding schedules
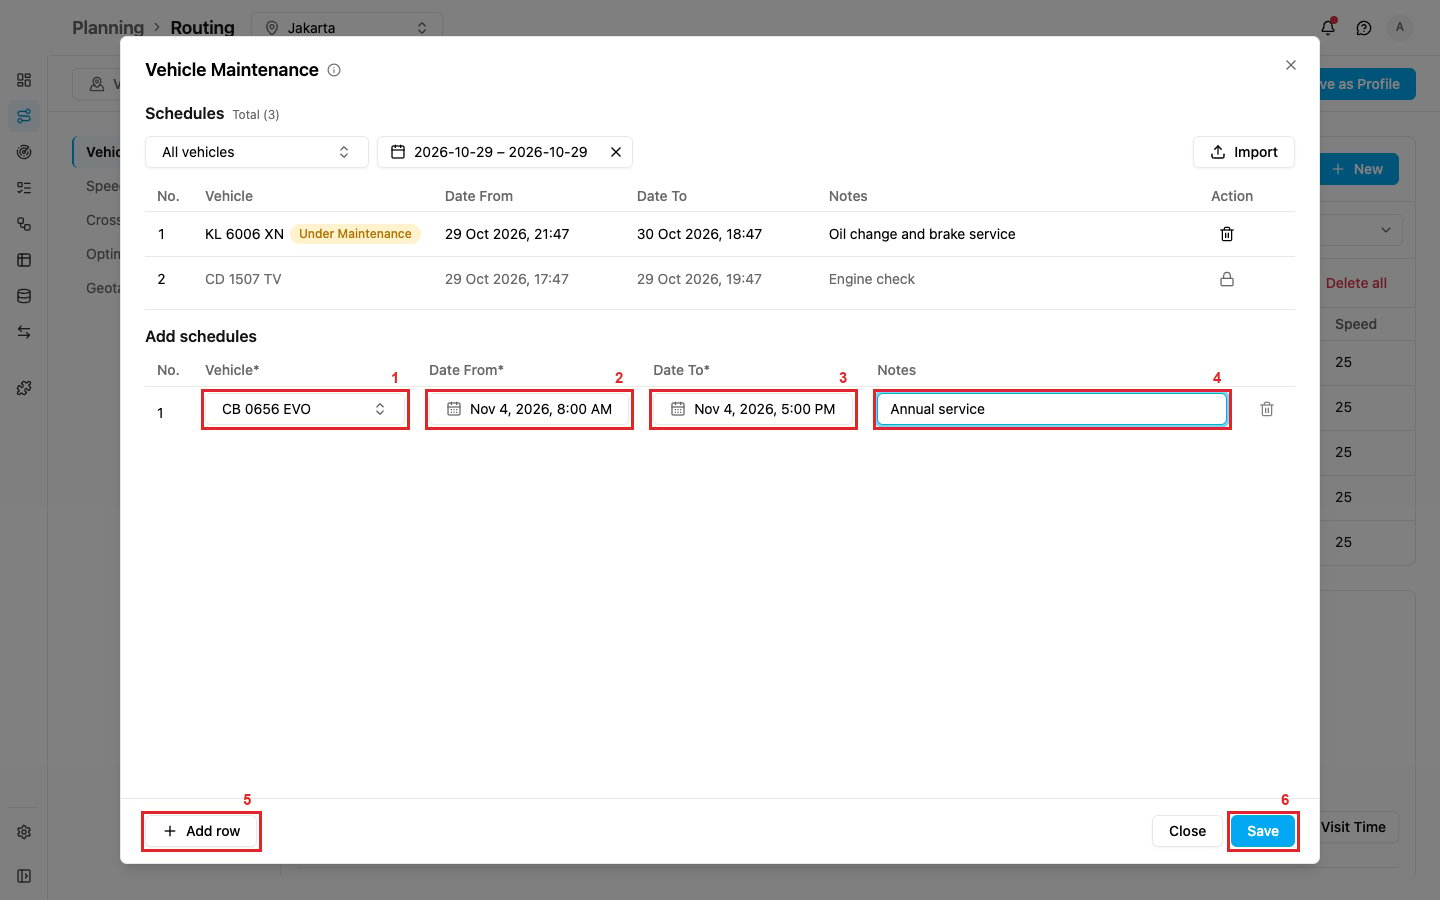
- Select the Vehicle (item 1 in the picture).
- Pick Date From, the date and time the maintenance starts (item 2 in the picture). An empty picker reads Pick a date and time.
- Pick Date To, the date and time the vehicle is back (item 3 in the picture). It must be later than Date From.
- Optionally, type Notes (item 4 in the picture), for example the work to be done. Up to 500 characters.
- To add more schedules in one go, click Add row (item 5 in the picture). The trash icon at the end of a row removes it.
- Click Save (item 6 in the picture).
Viewing, changing and deleting schedules
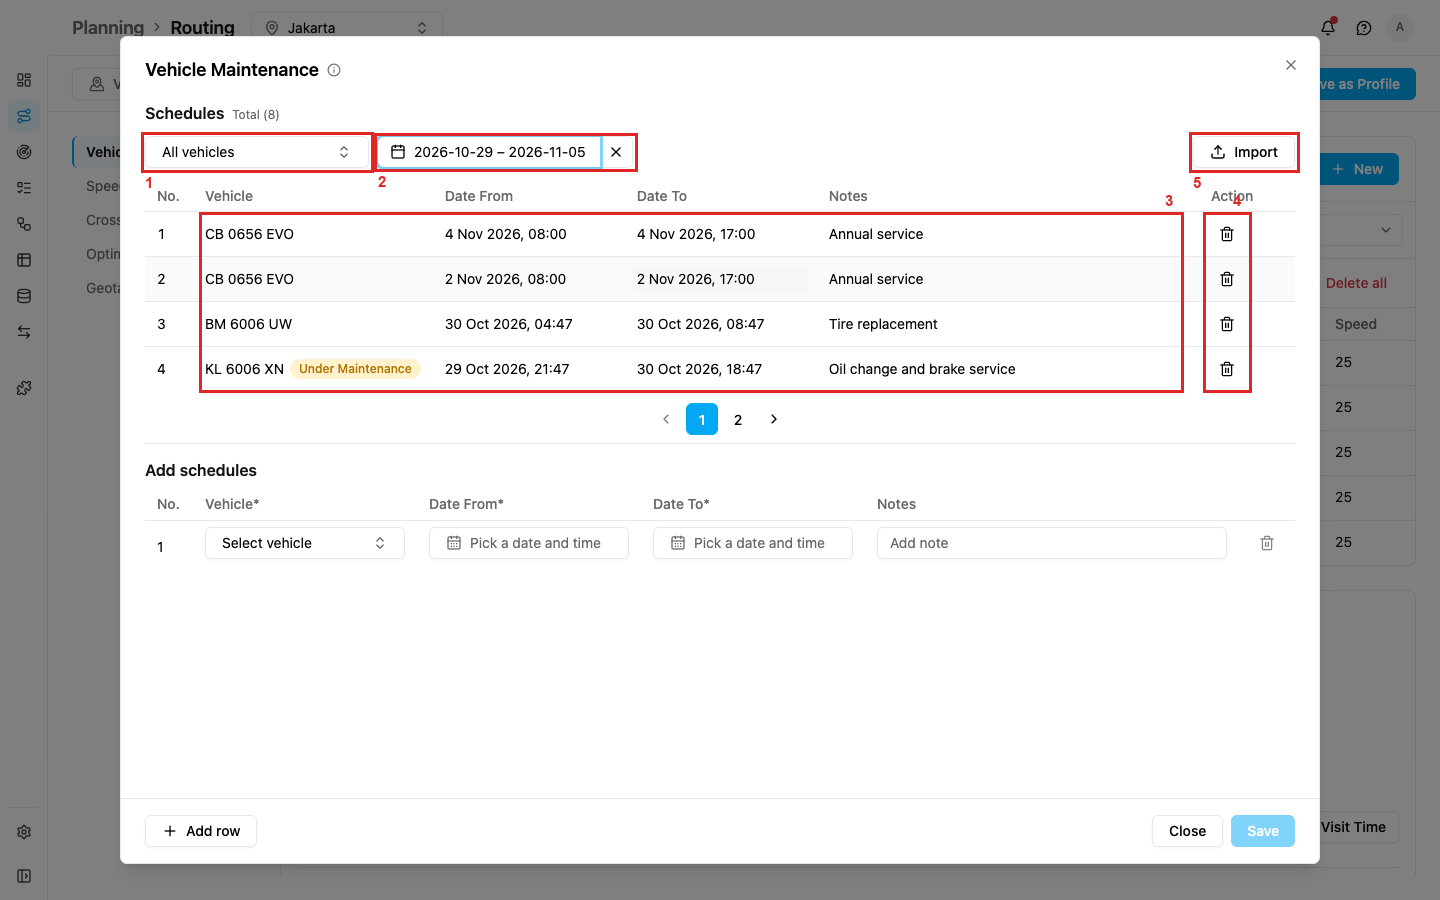
- Pick a vehicle to see only its schedules (item 1 in the picture). All vehicles shows the whole hub.
- Set the date range (item 2 in the picture). The table shows every schedule that overlaps those days. It starts with today.
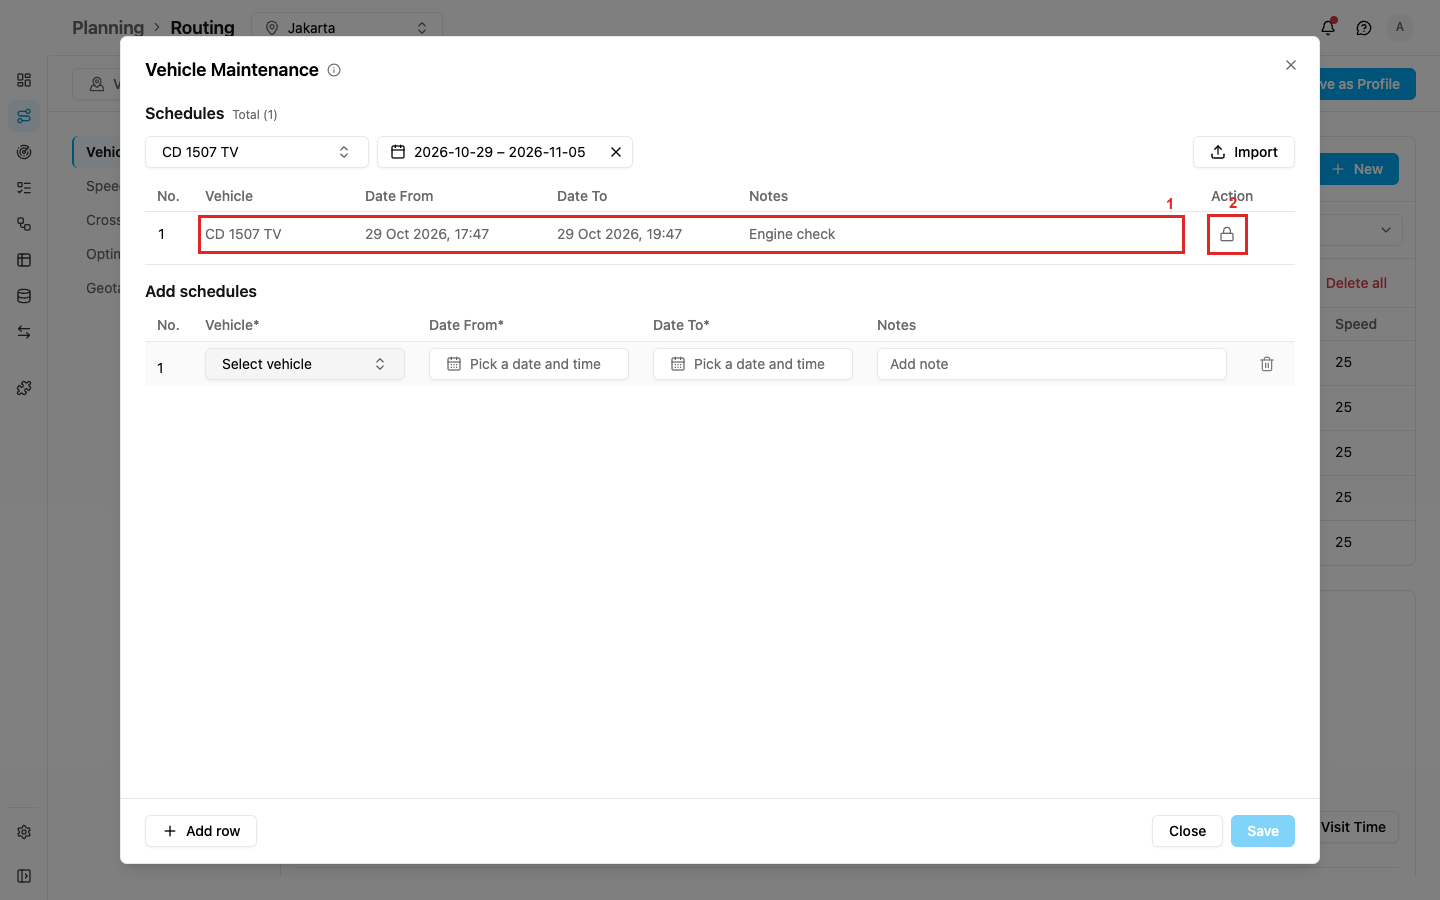
- Check the saved rows (item 3 in the picture). To change a value, click it. The change is saved when you leave the field (Maintenance schedule updated), and the same overlap rules apply.
- To delete a schedule, click its trash icon in Action (item 4 in the picture) and confirm. A deleted schedule can’t be restored.
- Import (item 5 in the picture) loads schedules from a spreadsheet. See Importing schedules.
Importing schedules
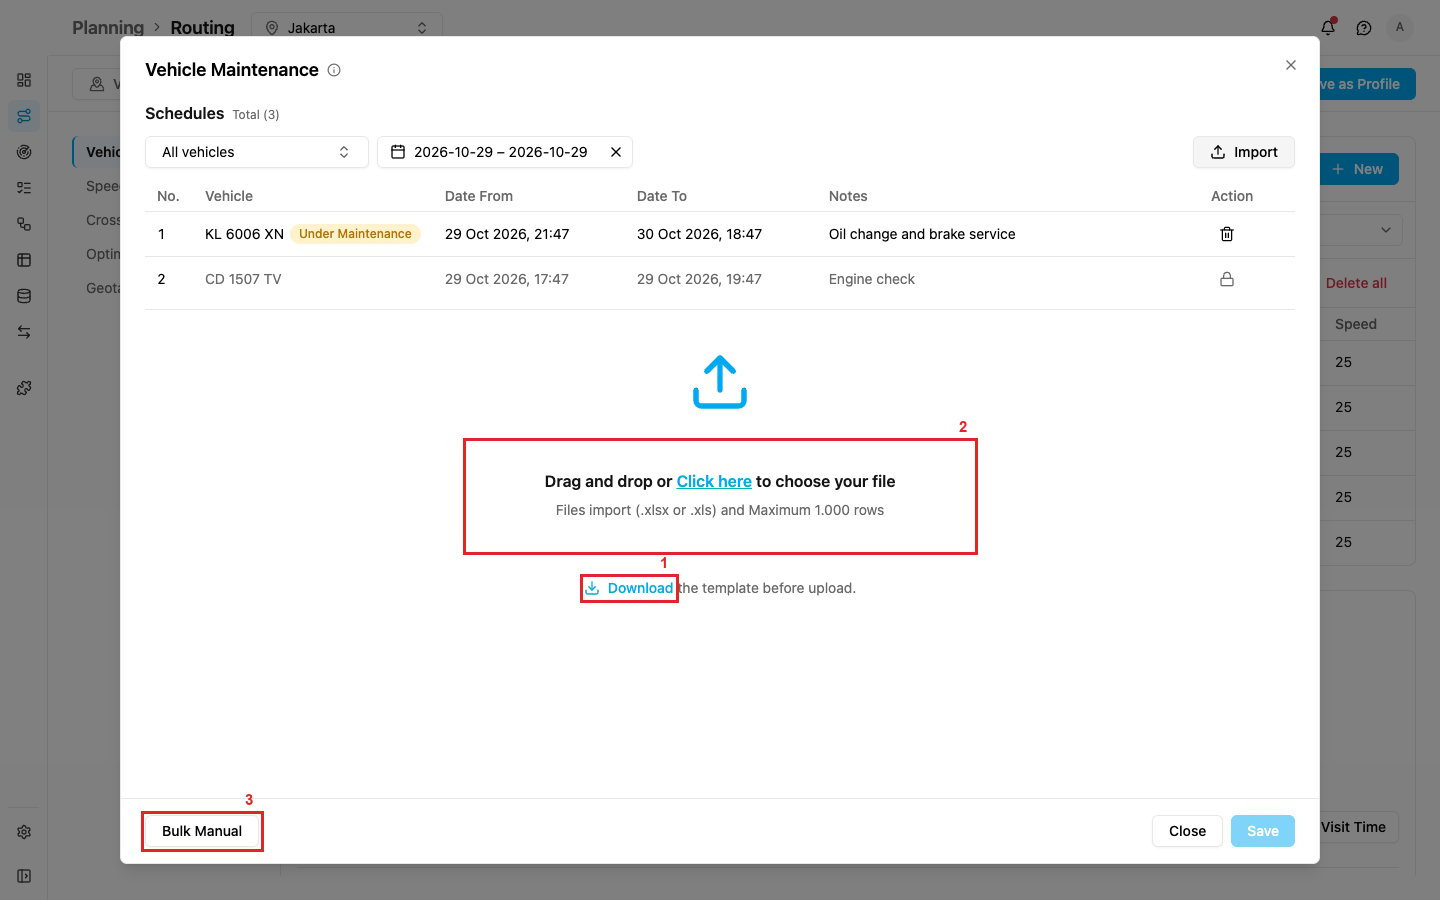
- Click Import in the schedule table.
- Click Download (item 1 in the picture) to get the template. It has the columns Vehicle*, Date From*, Date To* and Notes.
- Fill in one schedule per row. Write the vehicle name as it appears in the hub, and the dates as
YYYY-MM-DD HH:mmor as Excel dates. - Drag the file onto the box, or click Click here to choose it (item 2 in the picture). The file must be
.xlsxor.xls, no larger than 5 MB, with up to 1,000 rows. - The rows land in the form so you can review them: 3 schedules imported. Review them, then click Save. Nothing is saved until you click Save.
Badges and filters
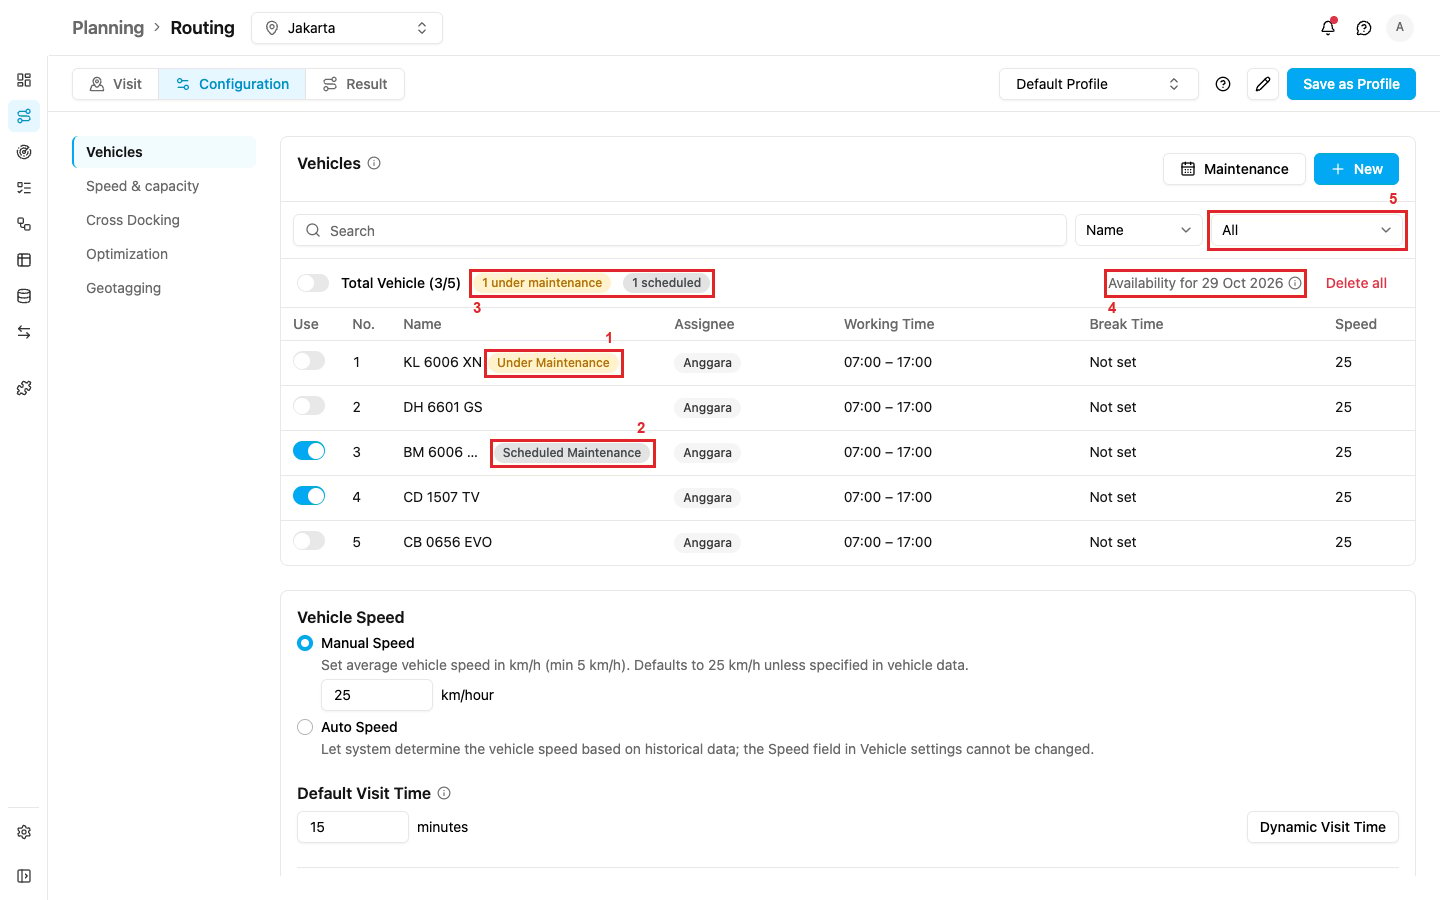
- Under Maintenance (item 1 in the picture): a schedule is running right now.
- Scheduled Maintenance (item 2 in the picture): a schedule starts within the next 24 hours.
- The summary next to Total Vehicle (item 3 in the picture) counts the hub’s vehicles, for example 1 under maintenance and 1 scheduled. Forced active vehicles count as under maintenance.
- Availability for 29 Oct 2026 (item 4 in the picture) is the routing date the Use switches are checked against. Its info icon explains: The routing date picked on the Visit page, or today. A schedule that touches this day keeps the vehicle out of optimization.
- The list next to the search (item 5 in the picture) filters the vehicles: All, Under maintenance (including forced active vehicles), Scheduled, or Available (vehicles that are not kept out on the routing date).
Using a vehicle under maintenance
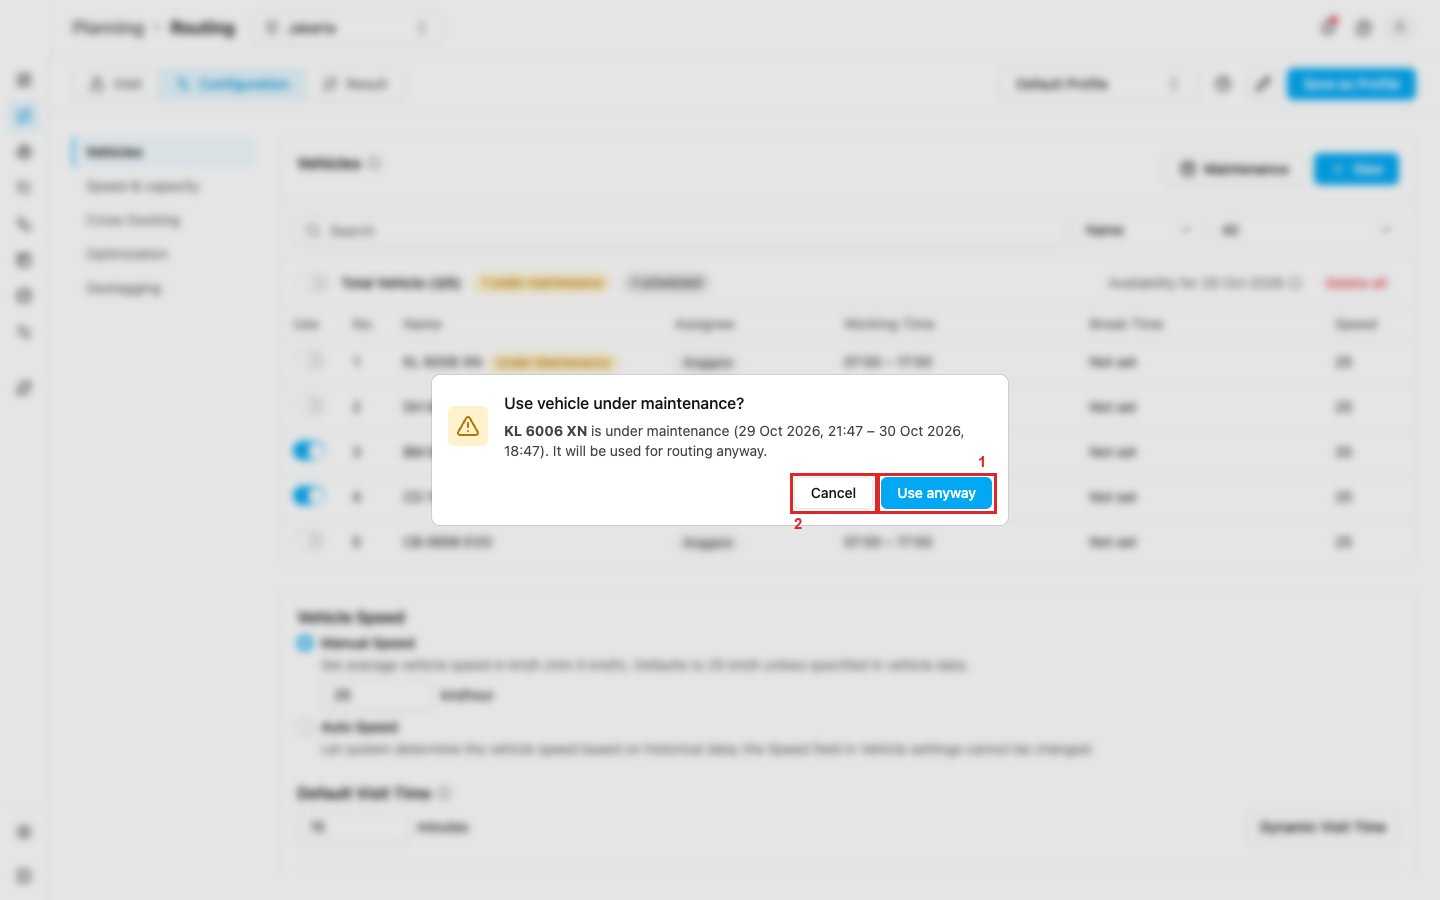
- Click Use anyway (item 1 in the picture) to include the vehicle in the optimization. It is marked Forced Active until its schedule ends or you turn it off.
- Click Cancel (item 2 in the picture) to keep the vehicle off.
Selecting all vehicles
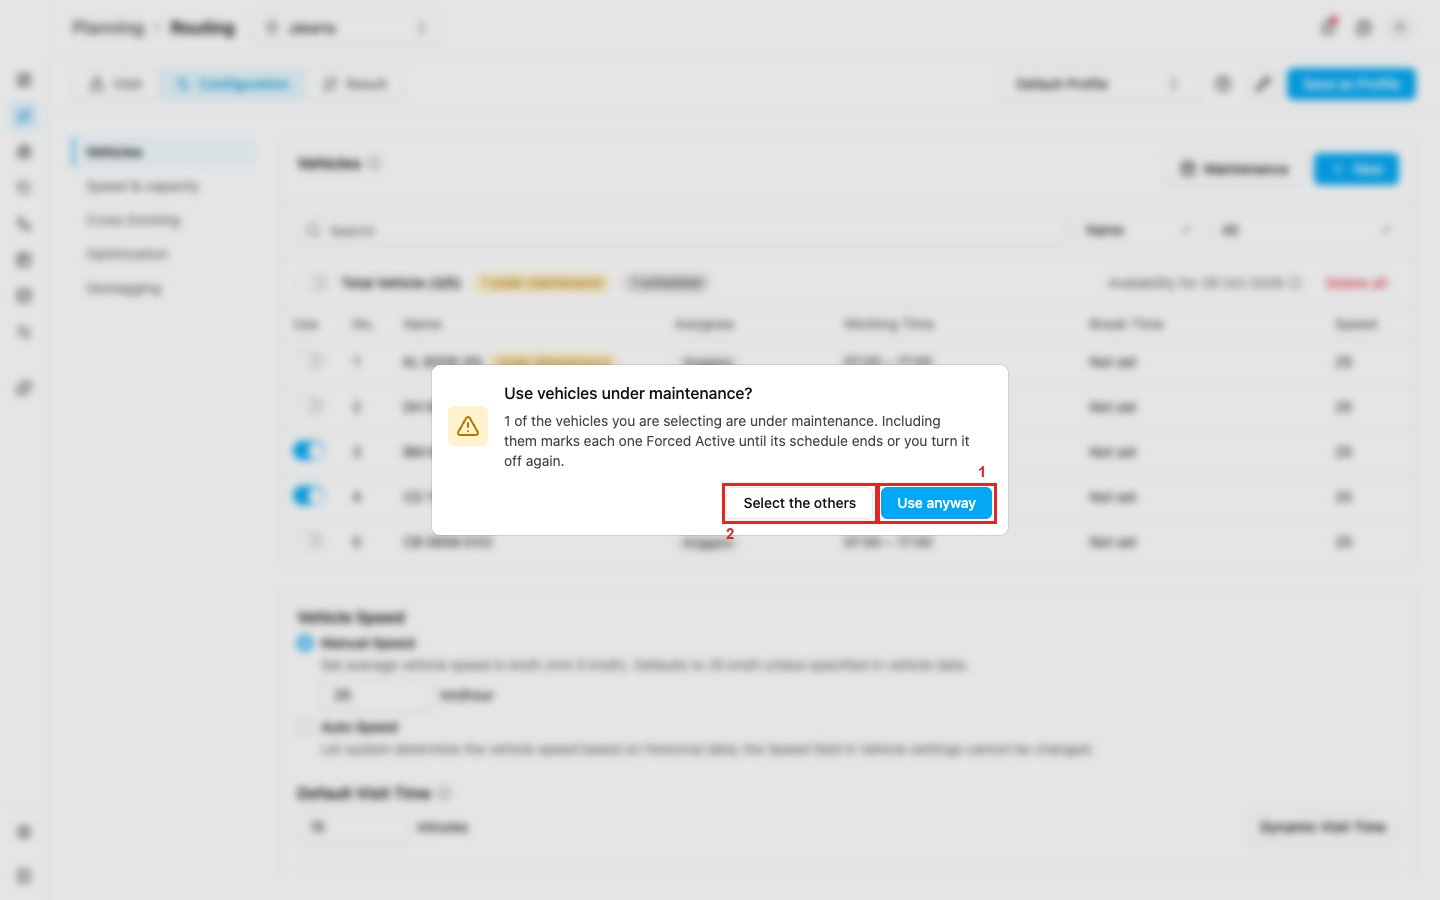
- Click Use anyway (item 1 in the picture) to select every vehicle, including the ones under maintenance, which become Forced Active.
- Or click Select the others (item 2 in the picture) to select every other vehicle and leave the ones under maintenance out. Closing the question works the same way as Select the others.
Notes
- Vehicle Maintenance uses the existing vehicle permissions. There is no separate maintenance permission. Without Edit vehicle you can look at the schedules but not add, change or delete them, and you can’t force a vehicle active.
- A routing schedule leaves out vehicles under maintenance on the day it runs, the same way. When every vehicle of its profile is under maintenance, the run is skipped with Profile has no vehicle.
- You can record a service that has already happened by adding a schedule in the past. It is saved as history and is read-only from then on.
- Deleting a vehicle also permanently deletes its maintenance schedules.
- Vehicles of a sub hub used by Cross Docking are scheduled from their own hub.