> ## Documentation Index
> Fetch the complete documentation index at: https://docsv4.mile.app/llms.txt
> Use this file to discover all available pages before exploring further.
# Bulk Create Task Schedules
> Create many task schedules at once from a spreadsheet, or by typing them into a table.
Required permission:
* View schedule
* Create schedule
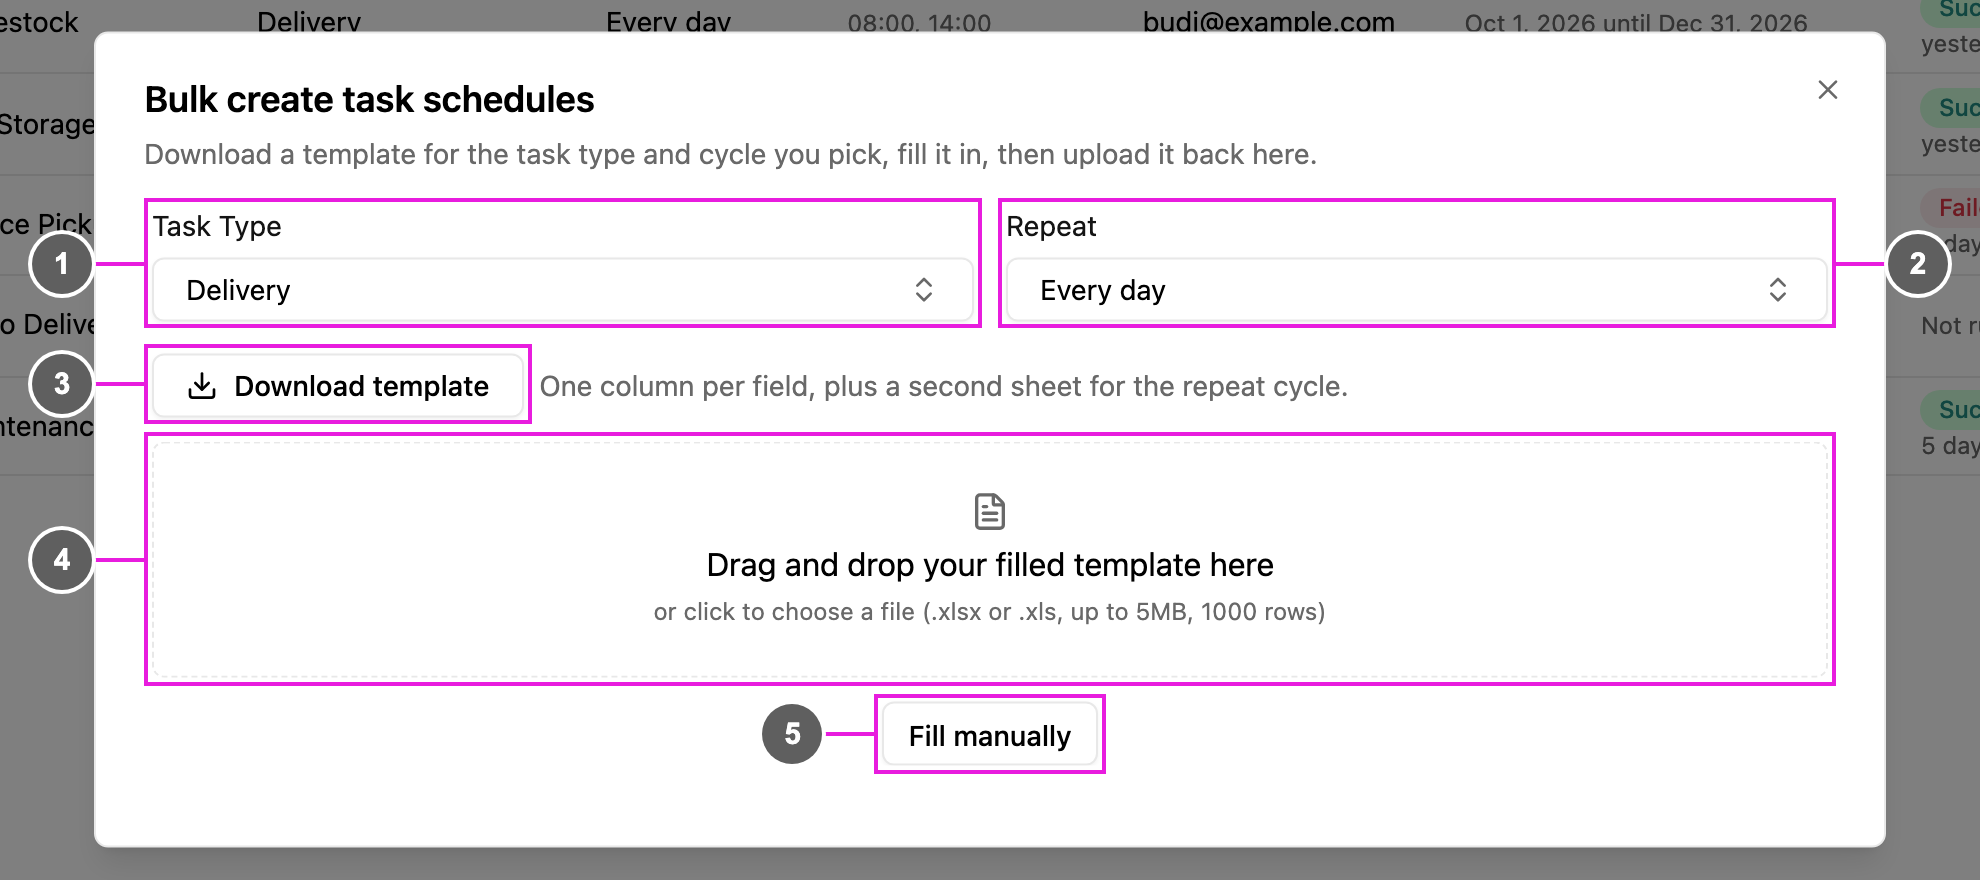
Open **Planning › Schedule** (the **Task** tab), click the arrow beside **New** and choose **Bulk**.
1. **Task Type**: the task type every schedule in the file creates tasks from.
2. **Repeat**: the repeat cycle every schedule in the file uses: Every day, Every week, Every month, On fixed dates or Custom cycle. See [Repeat cycles](/pages/planning/schedule/repeat-cycle/daily).
3. **Download template**: a spreadsheet made for the task type and repeat cycle you picked. It has two sheets:
* **Sheet 1** holds the schedules, one per row, with one column per field of the task type (for example customer name, address and coordinate). Required columns are marked with an asterisk (\*). The sheet is named after the task type.
* **Sheet 2** holds the repeat cycle details for each schedule, such as the times of day, weekdays or dates. The sheet is named after the repeat cycle.
4. **Upload area**: drop your filled template here, or click to choose it. The file must be .xlsx or .xls, up to 5 MB and 1,000 rows.
5. **Fill manually**: type the schedules into a table instead of uploading a file.
Pick the task type and repeat cycle **before** you download the template. Changing either of them later rebuilds every row, and the app warns you that the details entered so far will be lost.
## While the file is read
After you upload, the app reads the file, looks up coordinates for any addresses, and fills in data linked from your data sources. If some linked data isn't found, it says *Some data(s) are not found, but you could still continue the bulk task input process.*
The file is refused, with the reason, when:
| Message | Fix |
| - | - |
| *That is not an xlsx or xls file.* | Save the file as .xlsx or .xls. |
| *That file is over the 5MB limit.* | Split it into smaller files. |
| *The first sheet's name has to match the task type's name.* | Don't rename the sheets of the downloaded template. |
| *The second sheet's name has to match the repeat cycle.* | Use the template for the repeat cycle you picked. |
| *A bulk import is limited to 1000 rows.* | Split the file. |
| *That file could not be read.* | Download a fresh template and copy your data into it. |
## Review and create
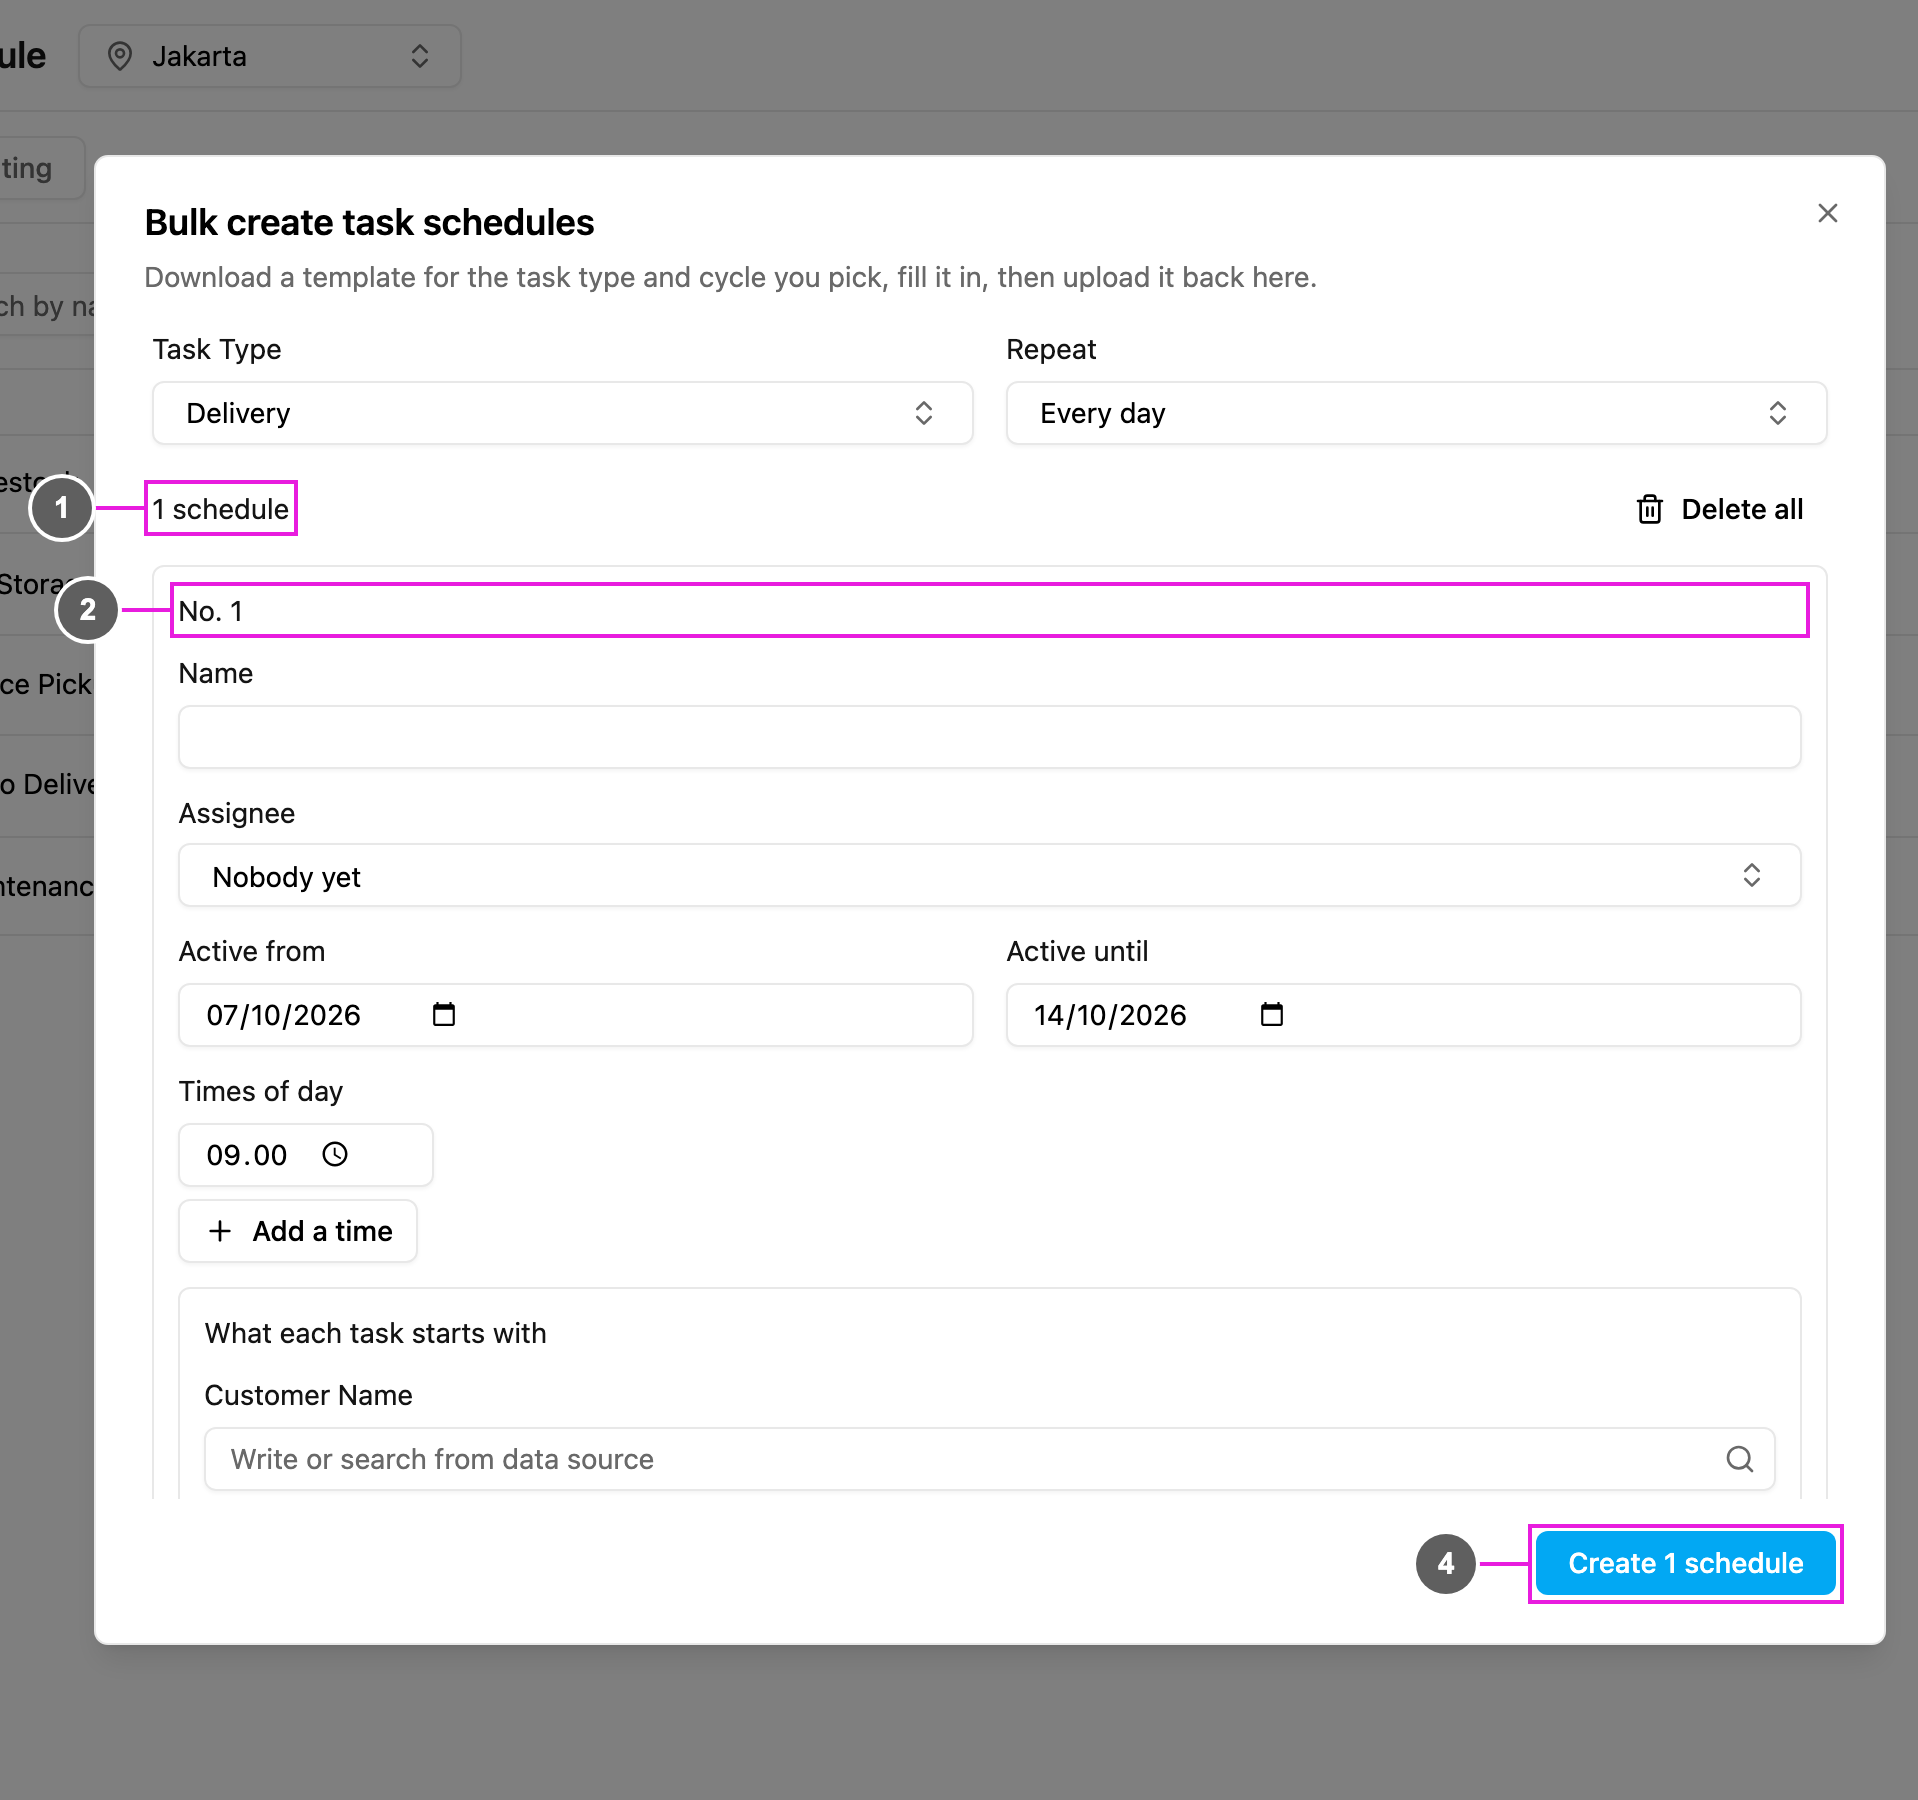
The schedules from your file, or the empty rows from **Fill manually**, open as a list you can check and edit before anything is created.
1. **Count**: how many schedules will be created. **Delete all** clears every row and goes back to the upload step.
2. **One block per schedule**, numbered: its **Name**, **Assignee**, **Active from** and **Active until**, **Times of day** (click **Add a time** for more), and *What each task starts with*: the fields of the task type, filled in for every task this schedule creates. Use **Remove this row** to drop a schedule, or **Add a row** to add one.
3. Long lists are shown page by page (*Showing 1 - 10 of 25*).
4. **Create N schedules**: creates every schedule in the list.
If any schedule has a problem, the app says *N schedules need a fix before this can be submitted.* Use **Previous** and **Next** to jump between the problems, fix them, then create the schedules.
When they're created, the app confirms it and the new schedules appear in the [schedule list](/pages/planning/schedule/manage-task-schedules).
This documentation is built and hosted on [Mintlify](https://mintlify.com), a developer documentation platform.