> ## Documentation Index
> Fetch the complete documentation index at: https://docsv4.mile.app/llms.txt
> Use this file to discover all available pages before exploring further.
# Vehicle Detail
> See each vehicle's visits, assignee, times and capacity, and switch or reassign vehicles.
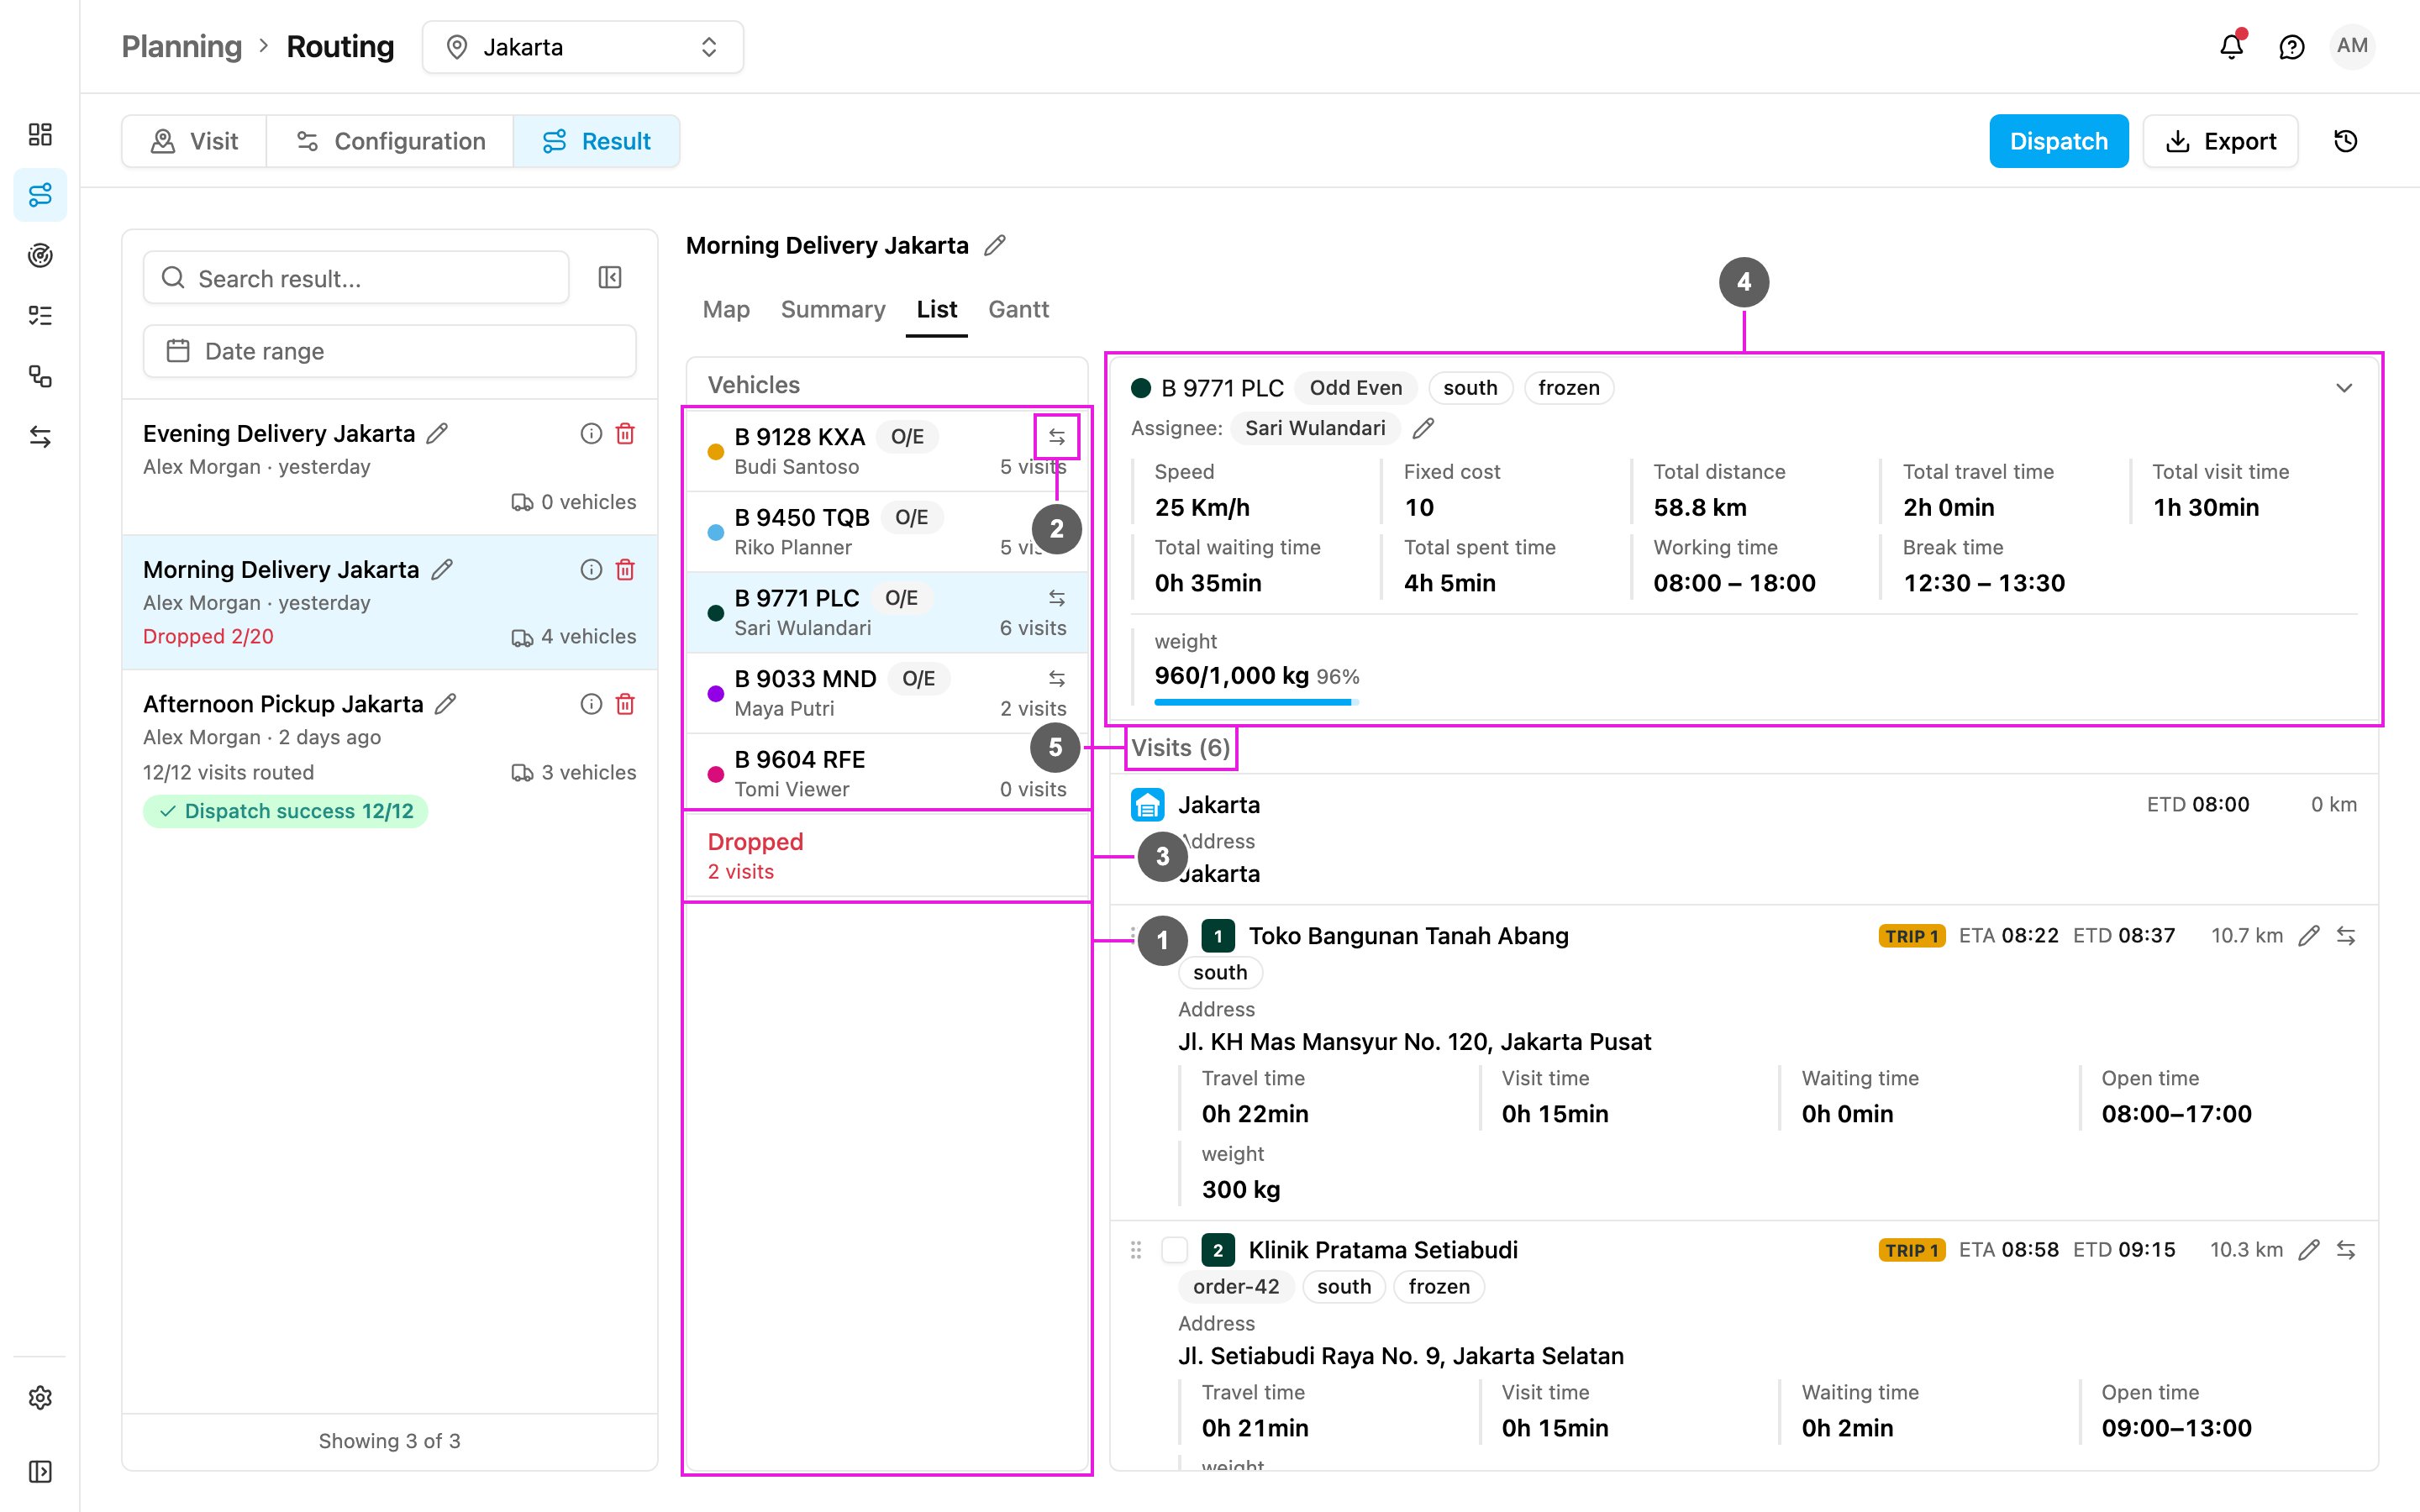
Open a result and pick **List**. The vehicles of the result are listed on the left; click one to see its details and its visits on the right.
Required permission:
* View result
* Edit result (change the assignee or switch vehicles)
1. **Vehicles**: every vehicle sent to the optimization. The colored dot matches the vehicle's route color on the map. Each row shows the vehicle name and an **O/E** badge when it has an odd-even plate type, with the assignee and the number of visits on the line below (**+1** and so on when the trips have more than one assignee; hover it to see them all). A vehicle without a driver shows **Unassigned**.
2. **Switch vehicle**: swap all visits with another vehicle. See [Switching vehicles](#switching-vehicles).
3. **Dropped**: the visits that could not be routed. See [Dropped Visit](/pages/planning/routing/result/dropped-visit).
4. **Vehicle detail**: the selected vehicle's information. See below.
5. **Visits**: the vehicle's visits in order, starting from the hub. The hub rows show the hub's name and address, like the visits. See [Visit Detail](/pages/planning/routing/result/visit-detail).
The assignees you can pick come from the users of the result's hub.
## Vehicle details
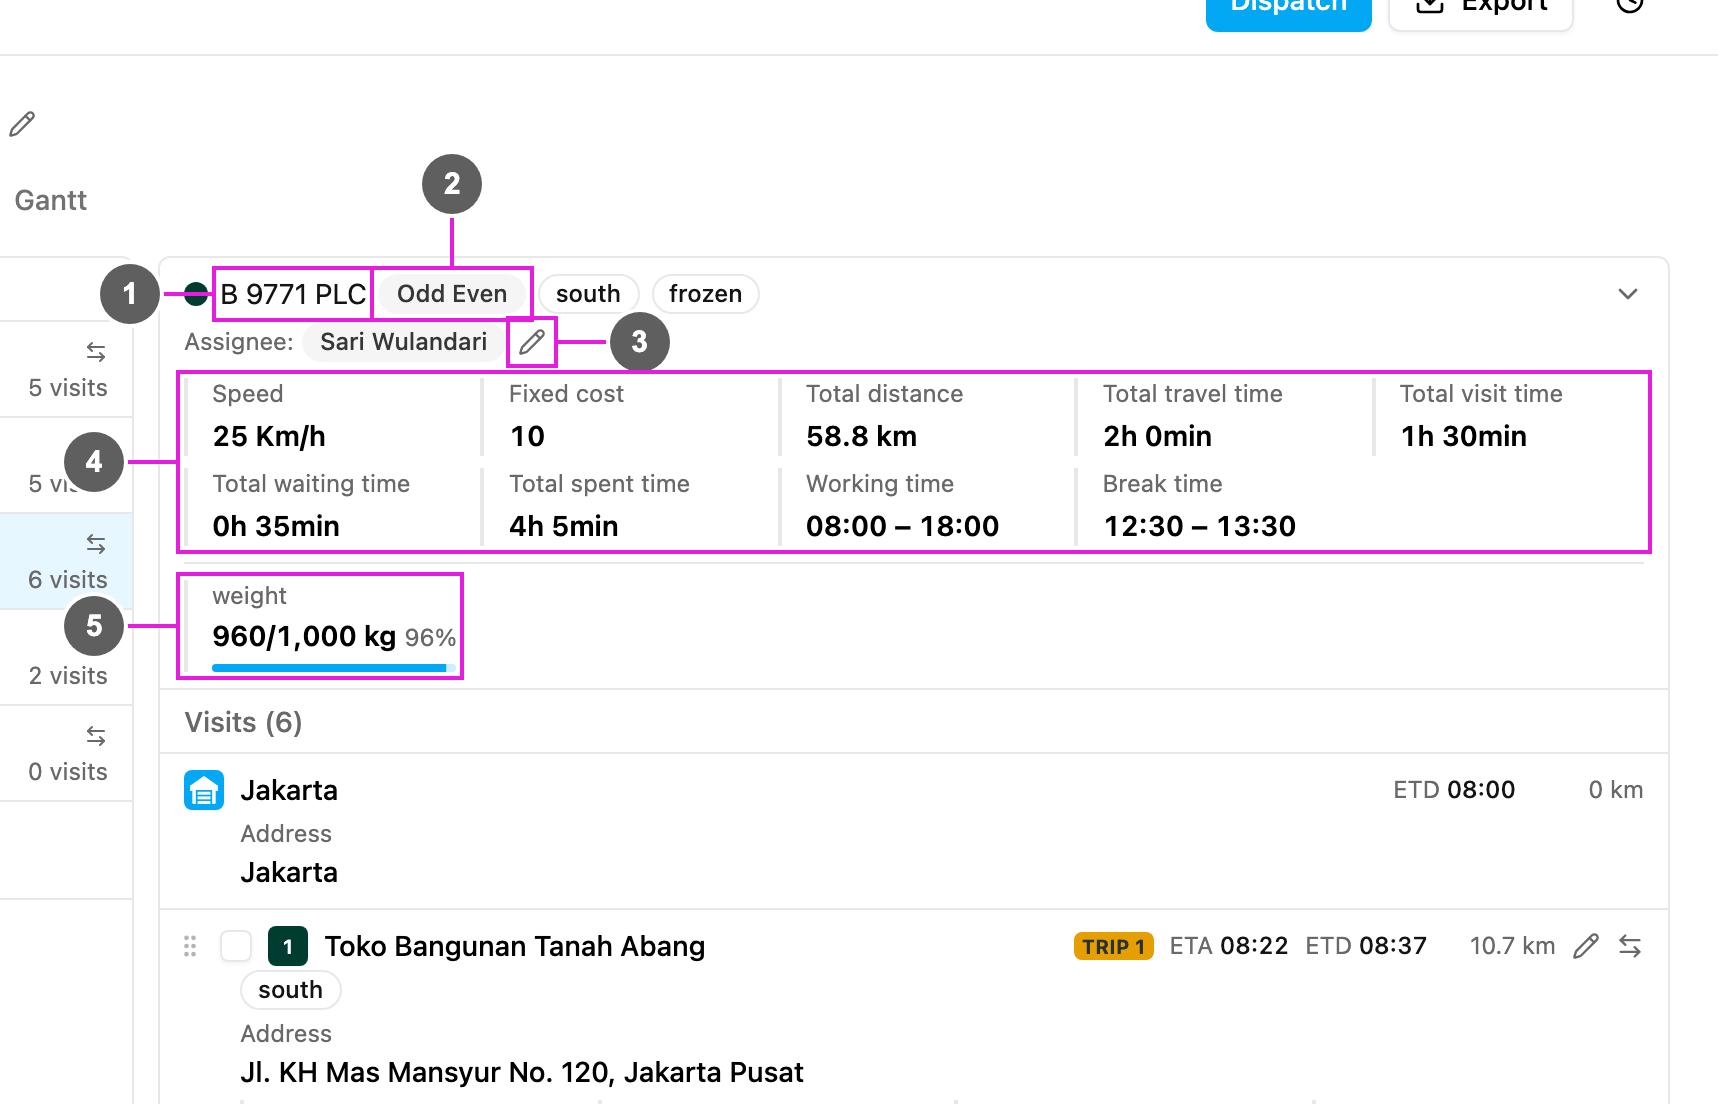
1. **Vehicle name**: with its route color.
2. **Badges**: **Odd Even** when the vehicle has a plate type, and the vehicle tags (here **south** and **frozen**).
3. **Assignee**: the field user who gets this vehicle's visits as tasks when you dispatch. Click the pencil (**Edit assignee**) to pick another user, or leave it **Unassigned**.
4. **Vehicle summary**: the vehicle's numbers:
* **Speed**: the vehicle speed, or **Auto Speed**.
* **Fixed cost**: the cost factor. A higher cost makes the vehicle less likely to be used.
* **Total distance**: the distance this vehicle drives.
* **Total travel time**, **Total visit time**, **Total waiting time** and **Total spent time** of this vehicle.
* **Working time** and **Break time** of the vehicle.
5. **Capacity**: for each capacity constraint, the load against the maximum and the share used, for example **weight 960/1,000 kg 96%**.
## Switching vehicles
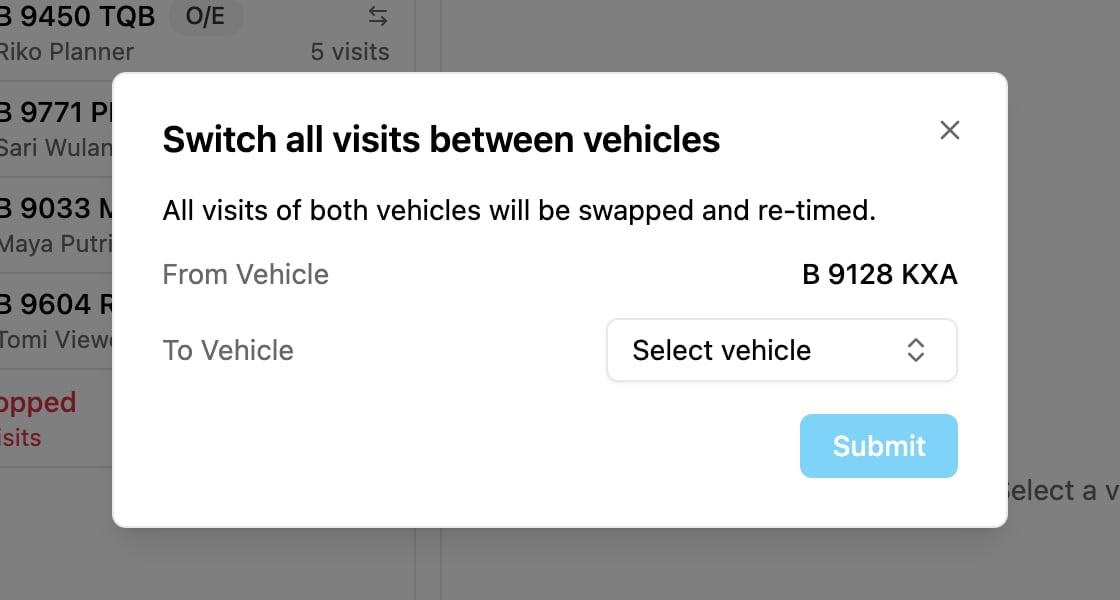
To give all visits of one vehicle to another vehicle, click **Switch vehicle** (the arrows icon) on the vehicle in the list. In **Switch all visits between vehicles**, pick the **To Vehicle** and click **Submit**. All visits of both vehicles are swapped and their times recalculated.
Switching does not check the vehicle's working time or tags. Make sure both vehicles have enough capacity for the visits they receive. If a vehicle goes over its capacity after the switch, you are warned with **Vehicle capacity limit exceeded after recalculation.**
This documentation is built and hosted on [Mintlify](https://mintlify.com), a developer documentation platform.