> ## Documentation Index
> Fetch the complete documentation index at: https://docsv4.mile.app/llms.txt
> Use this file to discover all available pages before exploring further.
# Cross Docking
> Route visits through sub hubs before they reach their destination.
**Cross Docking** extends routing with **sub hubs**: **Route visits through a sub-hub before their final destination.** Goods go from the main hub to a sub hub, and vehicles at the sub hub take them on to the visits.
Required permission:
* View configuration
* Edit configuration
## Turning on Cross Docking
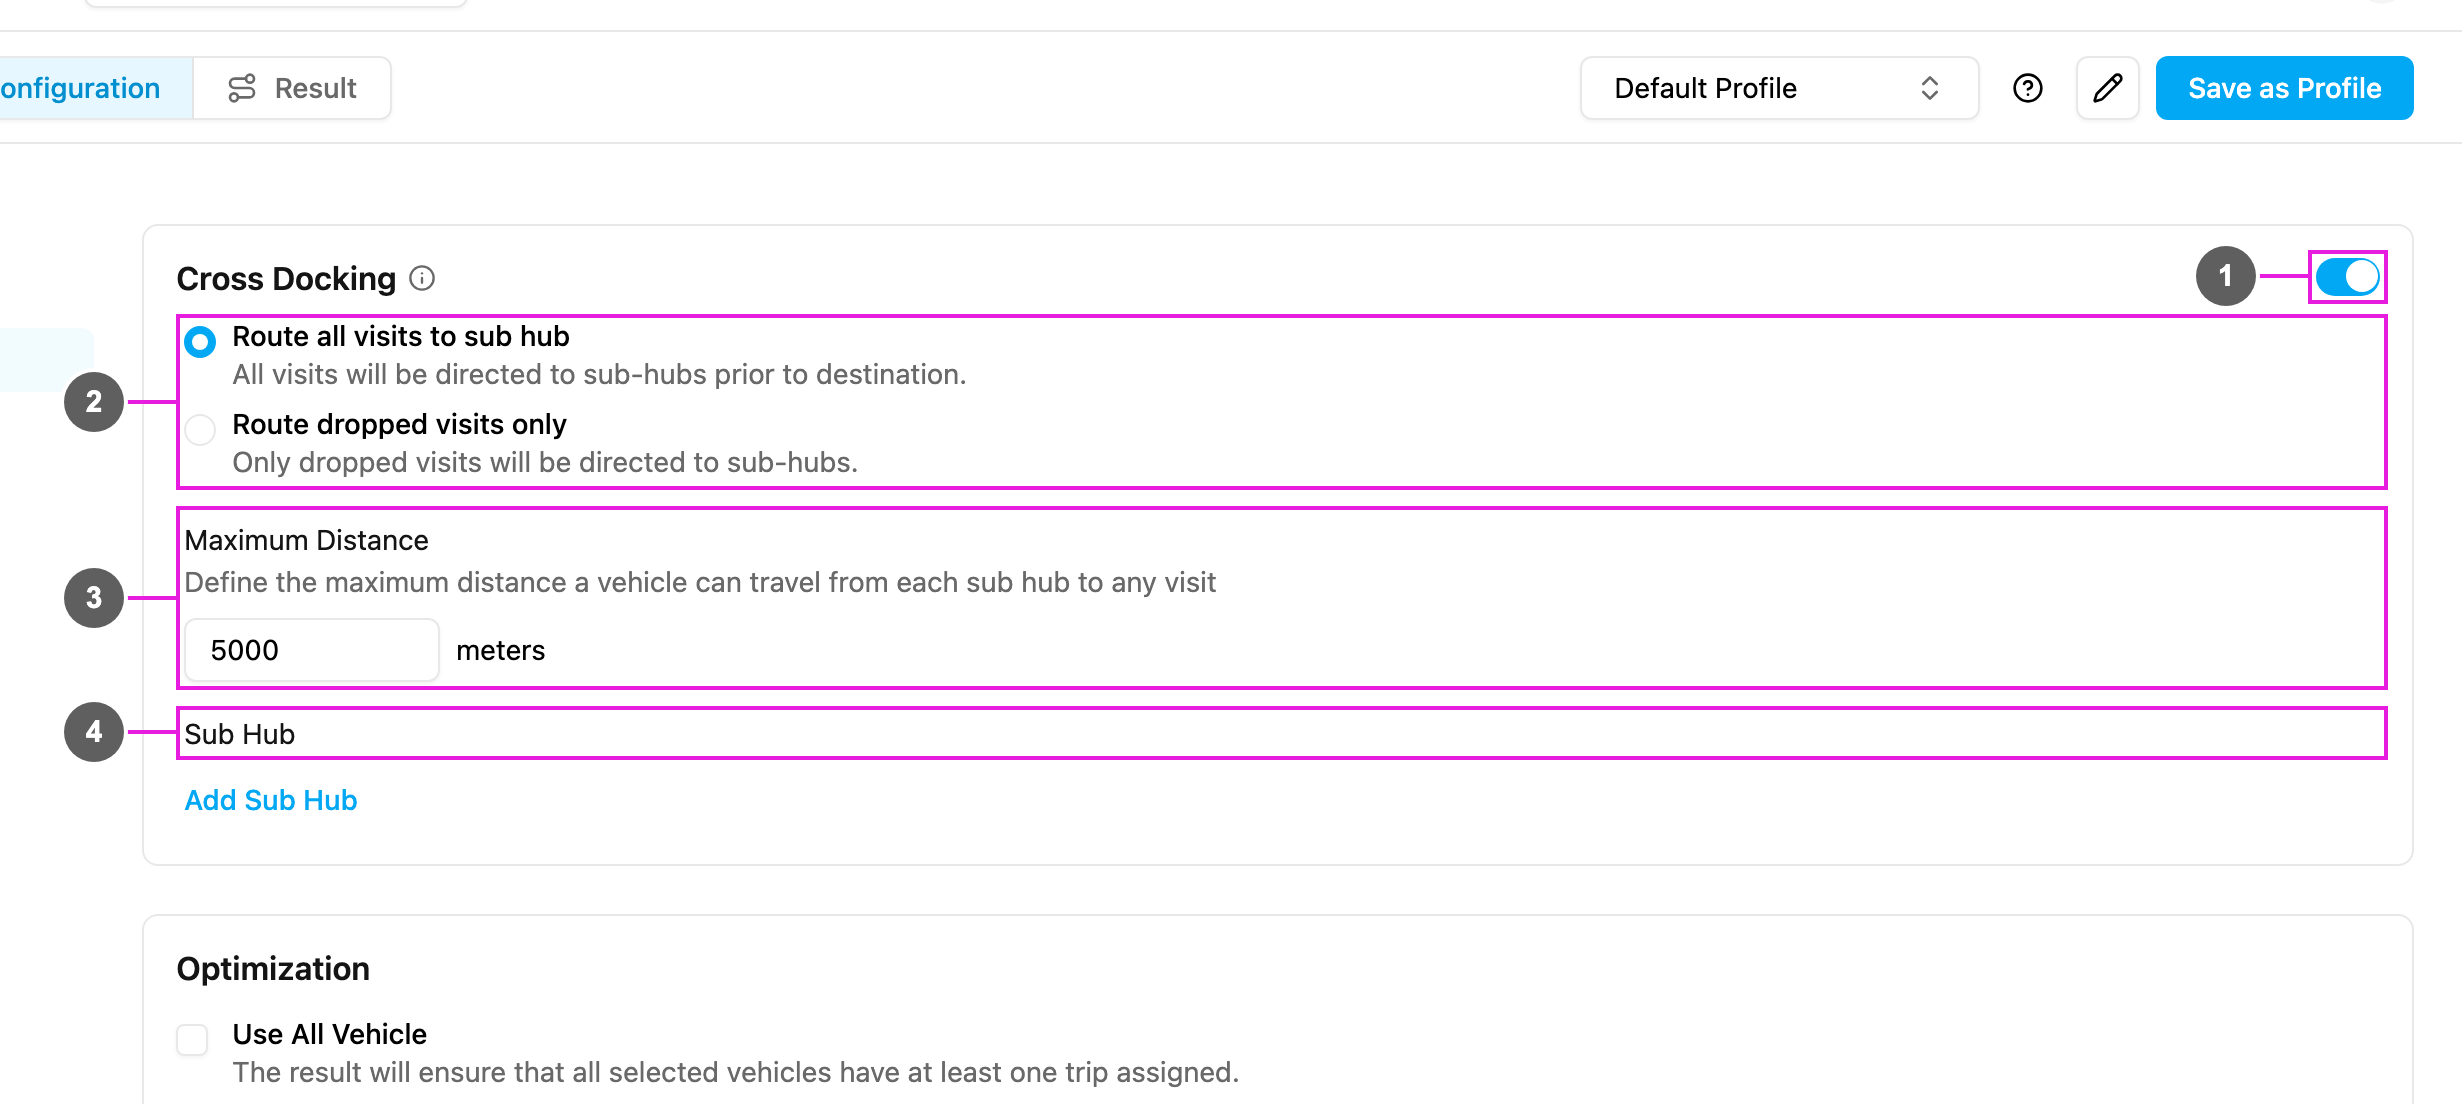
1. Open **Planning › Routing › Configuration** and go to **Cross Docking**.
2. Turn on the switch.
3. Choose the type and add the sub hubs. Every change is saved as soon as you make it.
1. **Switch**: turns Cross Docking on or off.
2. **Type**:
* **Route all visits to sub hub**: **All visits will be directed to sub-hubs prior to destination.**
* **Route dropped visits only**: **Only dropped visits will be directed to sub-hubs.** Visits the main hub cannot serve go through a sub hub; the main hub still delivers the rest directly.
3. **Maximum Distance**: **Define the maximum distance a vehicle can travel from each sub hub to any visit.** In meters, at least 1,000 (**The maximum distance field must be 1000 or more**). Leave it empty for no limit. It only applies to vehicles at sub hubs, not to vehicles from the main hub.
4. **Sub Hub**: the hubs used as sub hubs, with how many are selected. Click **Add Sub Hub** and choose a hub; remove one with its delete icon. Your plan sets how many sub hubs you can add (**A maximum of *n* Sub Hubs can be created.**). When there is no other hub, it shows **No other hub available.**
Turning Cross Docking off also clears the maximum distance.
## Vehicles at sub hubs
Sub hubs are chosen here, but their vehicles are set up in the sub hub itself:
1. Pick the sub hub at the top of the page and add its vehicles in [Vehicles](/pages/planning/routing/vehicle).
2. In the main hub, open a vehicle with **Edit vehicle** and turn on **Allow route to sub hub** to let it carry visits to a sub hub. This applies to the **Drop** type.
## Optimizing
With the configuration and vehicles in place, click **Optimize** on the [Visit](/pages/planning/routing/visit) page. The optimization runs in the background.
In the [result](/pages/planning/routing/result/introduction):
1. The vehicles are listed with the sub hub they belong to.
2. The map shows the routes from the main hub to the sub hubs and from the sub hubs to the visits.
3. The main hub and the sub hubs have different icons.
4. The summary shows the Cross Docking type used.
When you export the result, the **Others** sheet shows the Cross Docking type.
## Dispatching
When you click **Dispatch**, the tasks are assigned in the background. For every visit routed through a sub hub, an **extra handover task** is created from the main hub to the sub hub. These tasks carry information such as **Handover From** (the vehicle's assignee), **Handover To** and the **List Order** (the task title).
* Tasks routed to a sub hub are moved to that sub hub.
* To see those assignments on the [Task](/pages/activities/task/introduction) page, pick the sub hub at the top of the page.
This documentation is built and hosted on [Mintlify](https://mintlify.com), a developer documentation platform.