> ## Documentation Index
> Fetch the complete documentation index at: https://docsv4.mile.app/llms.txt
> Use this file to discover all available pages before exploring further.
# Assigning Task
Required permission:
* View Task
* Assign Task
A Task can have either one of the three status:
1. **Unassigned** ➝ When the task has not been assigned to anyone
2. **Ongoing** ➝ When the task has been assigned to someone but not done yet
3. **Done** ➝ When the task has been done
A task can be assigned to multiple people; if a task is assigned to multiple people, they can all see it and its details, but only one person can actually do it and mark it as done.
## Assigning Each Task Individually
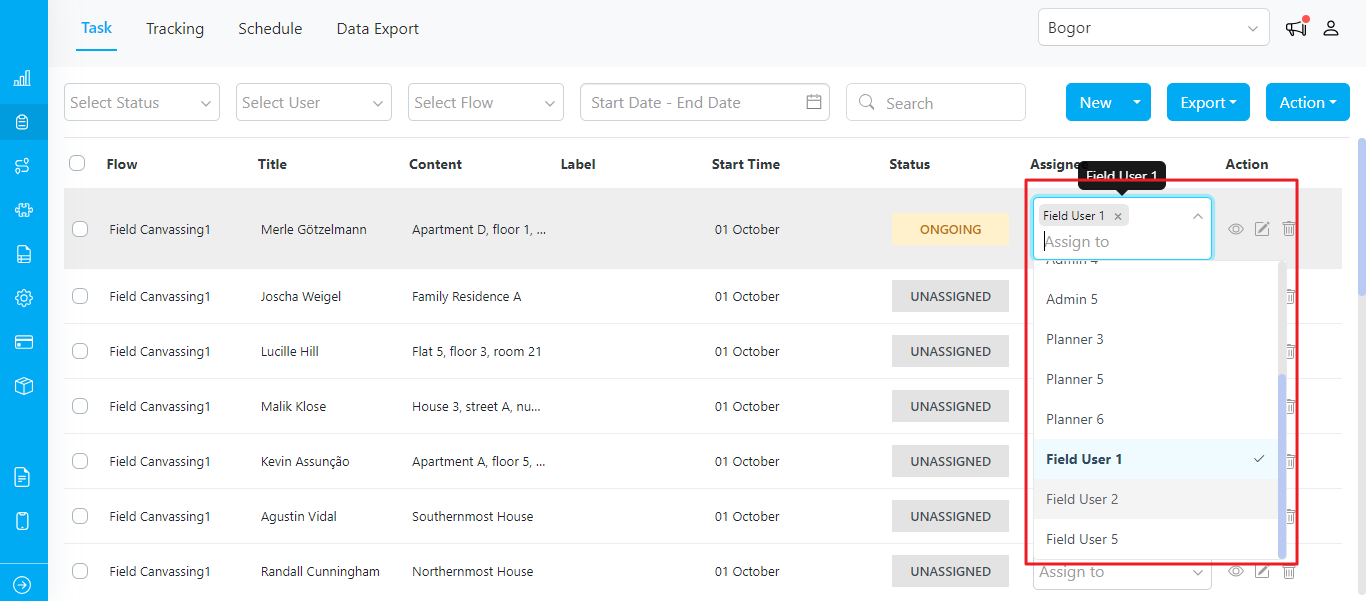
If you want to assign each task individually, select one or more assignees from the assignee column in the task.
Assigning tasks individually from the Task menu
## Assigning Many Tasks at Once
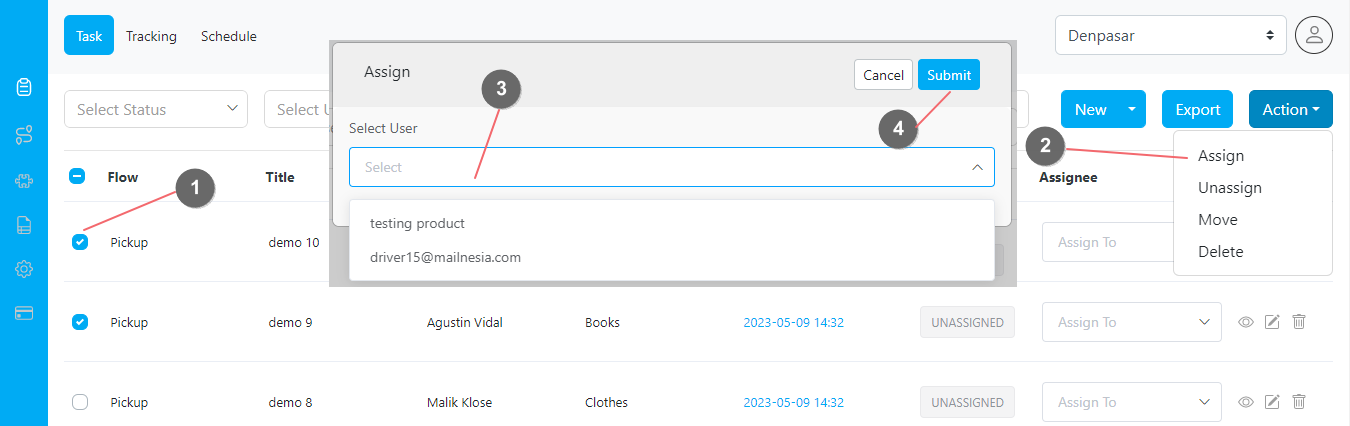
Multiple tasks can be assigned at once using the multiple selection boxes. Follow these steps to do so:
1. Check the select box on the tasks you want to assign
2. Click on **Action ➝ Assign**
3. Select the assignee(s) on the popup menu
4. Click on the submit button to assign multiple tasks at once
Similarly, multiple tasks can be **unassigned**, **moved**, or **deleted** from the **action** button.
Assigning multiple tasks using the Action ➝ Assign feature
This documentation is built and hosted on [Mintlify](https://mintlify.com), a developer documentation platform.