> ## Documentation Index
> Fetch the complete documentation index at: https://docsv4.mile.app/llms.txt
> Use this file to discover all available pages before exploring further.
# Creating an Order
> Create one order from the web app: choose the Order Type and hub, fill in its fields, and the Order Type's steps start.
Create an order from **Activities › Order** with **New**. To create many orders at once, use [Import](/pages/activities/order/import-and-export). Orders can also be sent by API, or created when a task finishes, if the Order Type starts that way.
Required permission:
* View Order
* Add Order
At least one Order Type must be published. See [Order Type](/pages/workflow/order-type/introduction).
## Create an order
1. Open **Activities › Order** and click **New**.
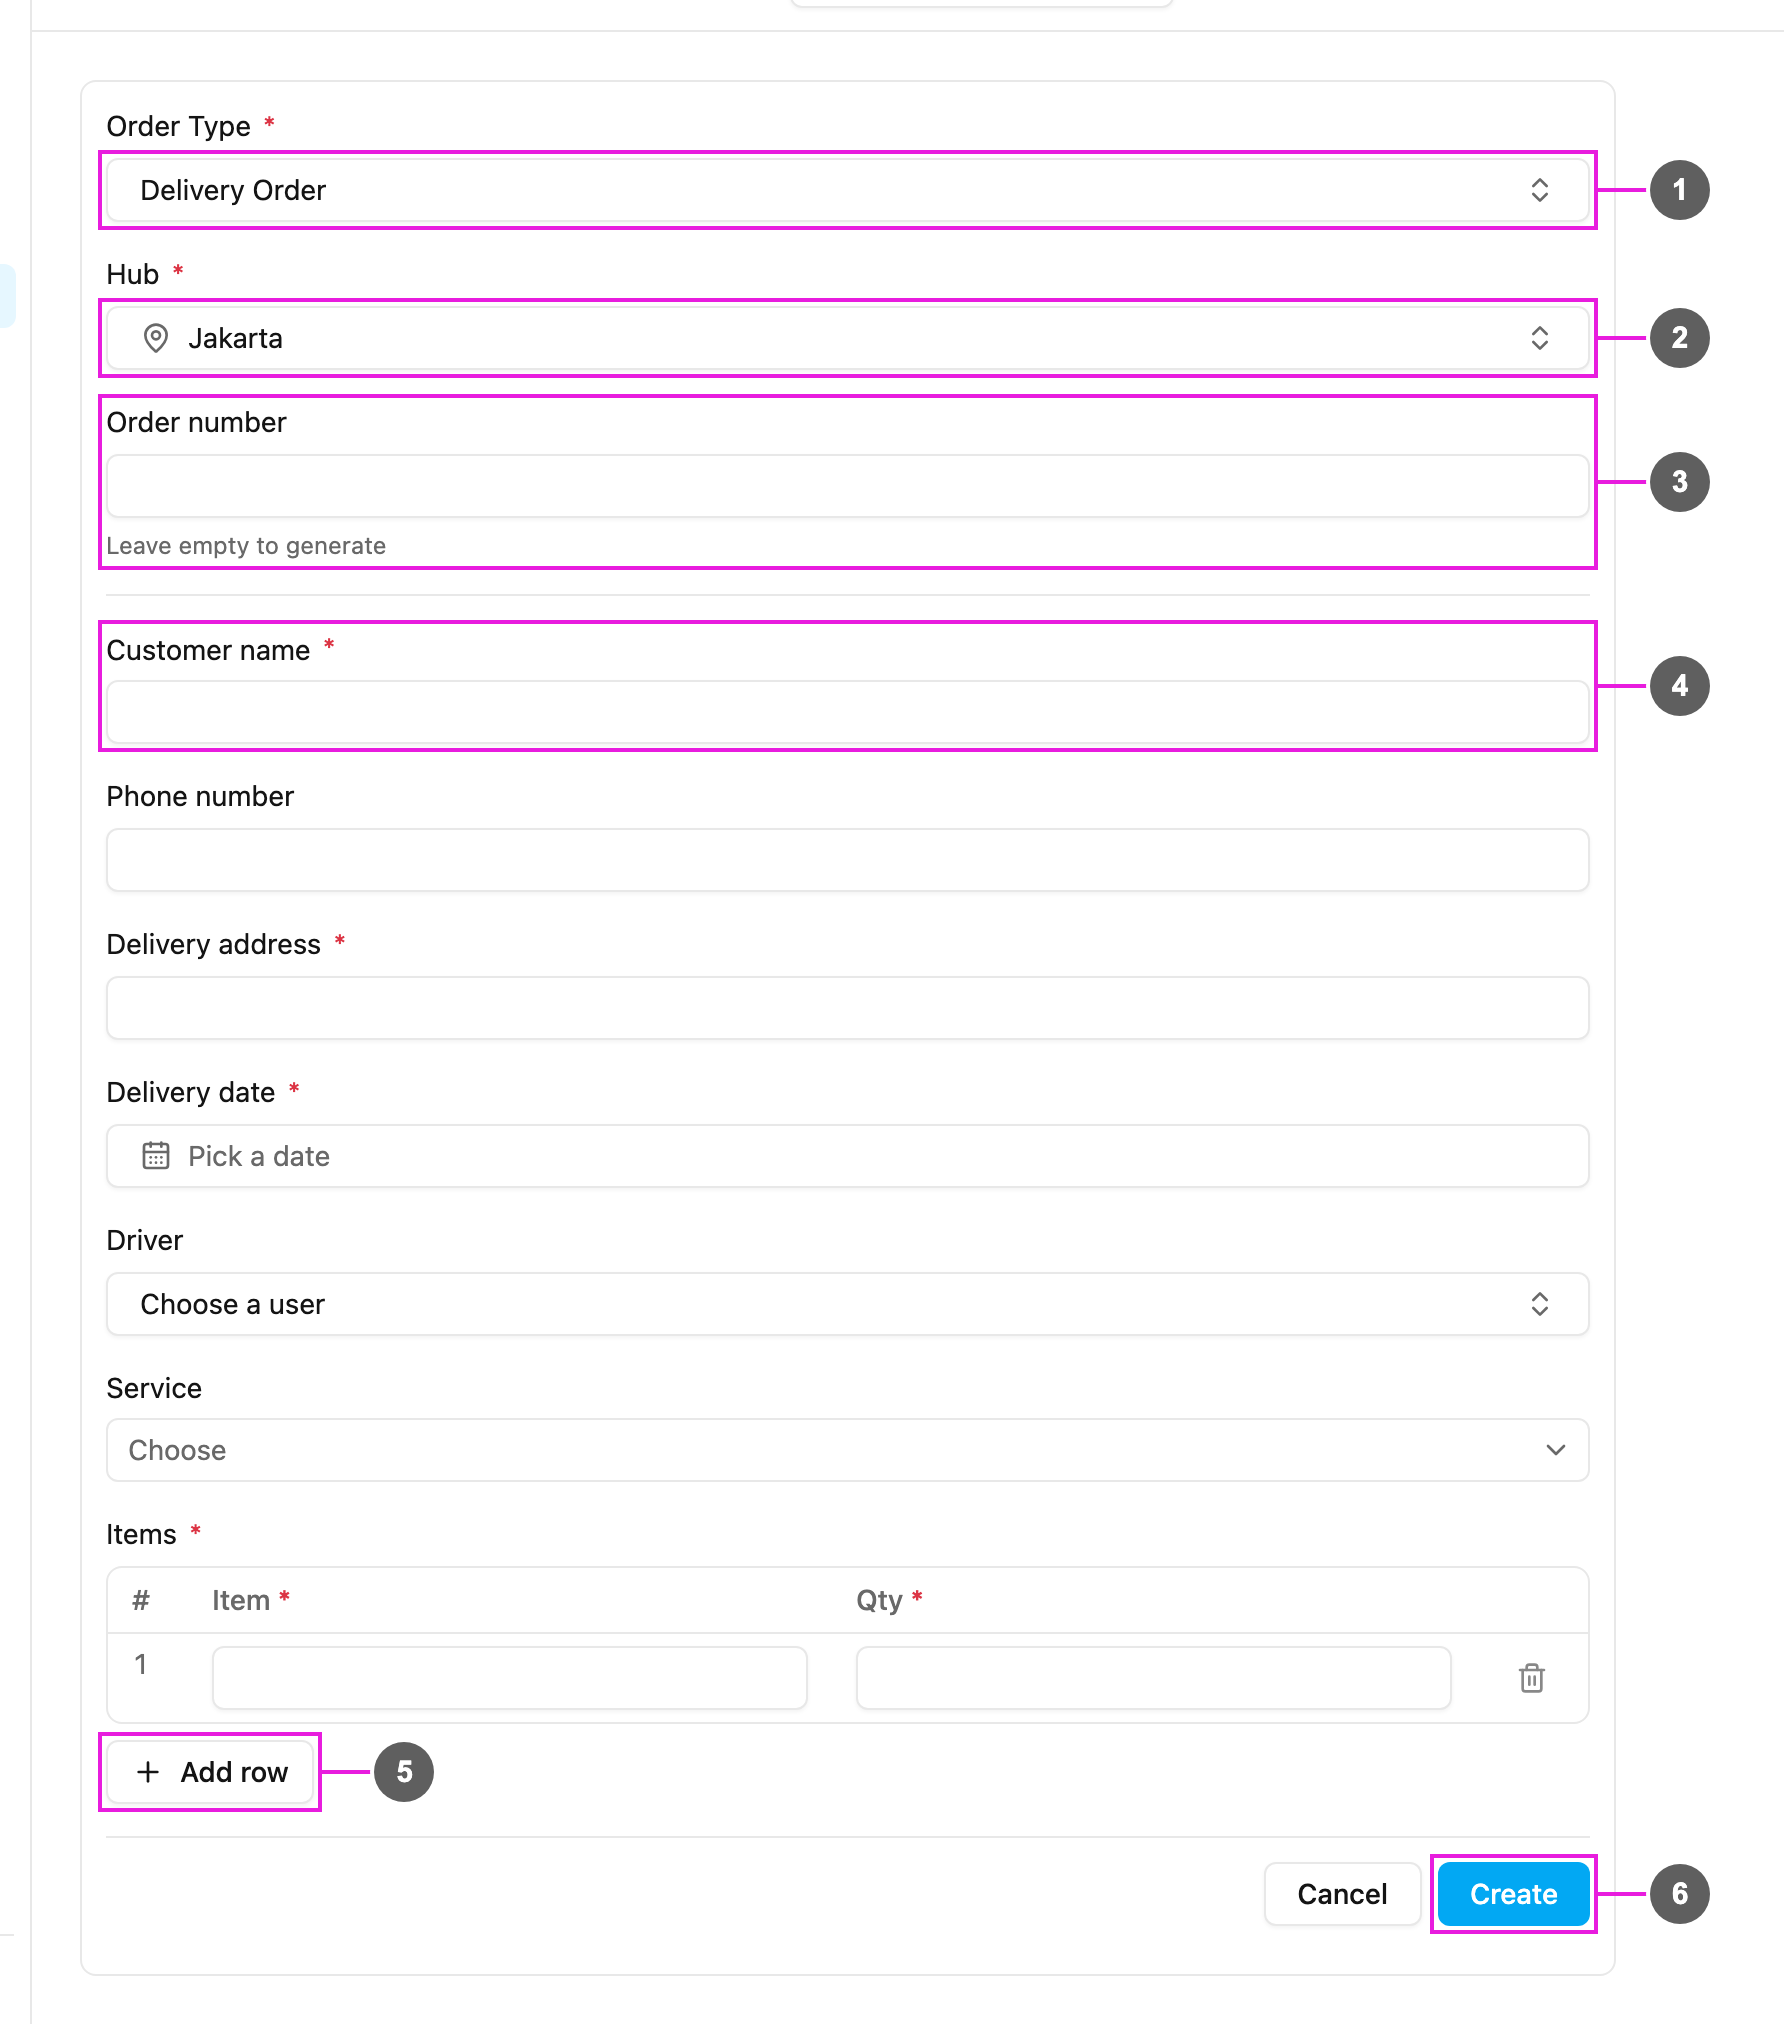
2. Choose the **Order Type**. The form shows that Order Type's fields.
3. Fill in the form and click **Create**.
1. **Order Type**
The kind of order to create. The page title changes to "New" plus the type's name, for example "New Delivery Order". If you change the type after typing some values, you're asked to confirm, because changing the Order Type clears what you entered.
2. **Hub**
The hub the order belongs to. It starts with the hub selected in the header. Required.
3. **Order number**
How this field behaves depends on the Order Type's numbering rule:
* **Typed in**: the field is required; type the order's number.
* **Automatic**: the field is hidden; the number is made for you (for example `DO/2026/10/0006`).
* **Automatic if empty**: the field is optional, with the hint "Leave empty to generate". Type a number, or leave it empty to get one made for you.
A number that another order already uses is refused with "Order number … is already used".
4. **Order fields**
The fields of the Order Type, in the order set there. Fields with a red asterisk are required. Each field takes the input that suits its type:
| Field type | How you fill it in |
| - | - |
| Text, Phone number | Type the value. |
| Number | Type a number. Minimum and maximum are checked ("Must be at least …"). |
| Option | Choose one of the Order Type's options. |
| Date, Date & time, Time | Pick from the calendar or time picker. |
| User | Choose a user ("Choose a user"); you can search by name. |
| Yes / No | Switch on or off. |
| Coordinate | Type the latitude and longitude. |
| Reference to data | Choose a record from the linked data. A value that no longer exists is refused ("This record doesn't exist"). |
| List (line items) | A small table. Fill one row per line. A required list starts with one empty row. |
5. **Add row**
Adds a row to a list field. The bin icon at the end of a row removes it.
6. **Create**
Creates the order. **Cancel** goes back to the list without saving.
## After you click Create
* You see "Order … created." and the order opens.
* The Order Type's steps start. Depending on how it's built, the order may create its first task right away, wait for a status, or call another system. You can follow it on the [order's page](/pages/activities/order/order-detail).
If the Order Type matches orders by a unique value (for example an external reference) and an order with the same value already exists, that order is **updated** instead of a new one being created. You then see "Order … already existed and was updated." An order that has already finished cannot be updated this way, and the form says so.
## Related
* [Order](/pages/activities/order/introduction)
* [Import and export](/pages/activities/order/import-and-export)
* [Order Type](/pages/workflow/order-type/introduction)
This documentation is built and hosted on [Mintlify](https://mintlify.com), a developer documentation platform.