> ## Documentation Index
> Fetch the complete documentation index at: https://docsv4.mile.app/llms.txt
> Use this file to discover all available pages before exploring further.
# Access Token
> Create personal access tokens that let your own systems use the API on your behalf.
A **personal access token** lets another system, such as your ERP, warehouse system or a script, use the API as you. Each token has a name and an expiry date. You can have up to **10 tokens** at a time, for example one per system, so you can remove one system's access without affecting the others.
Required permission:
* Manage personal access token
Without this permission, **Access Token** doesn't appear in your profile menu.
## The token list
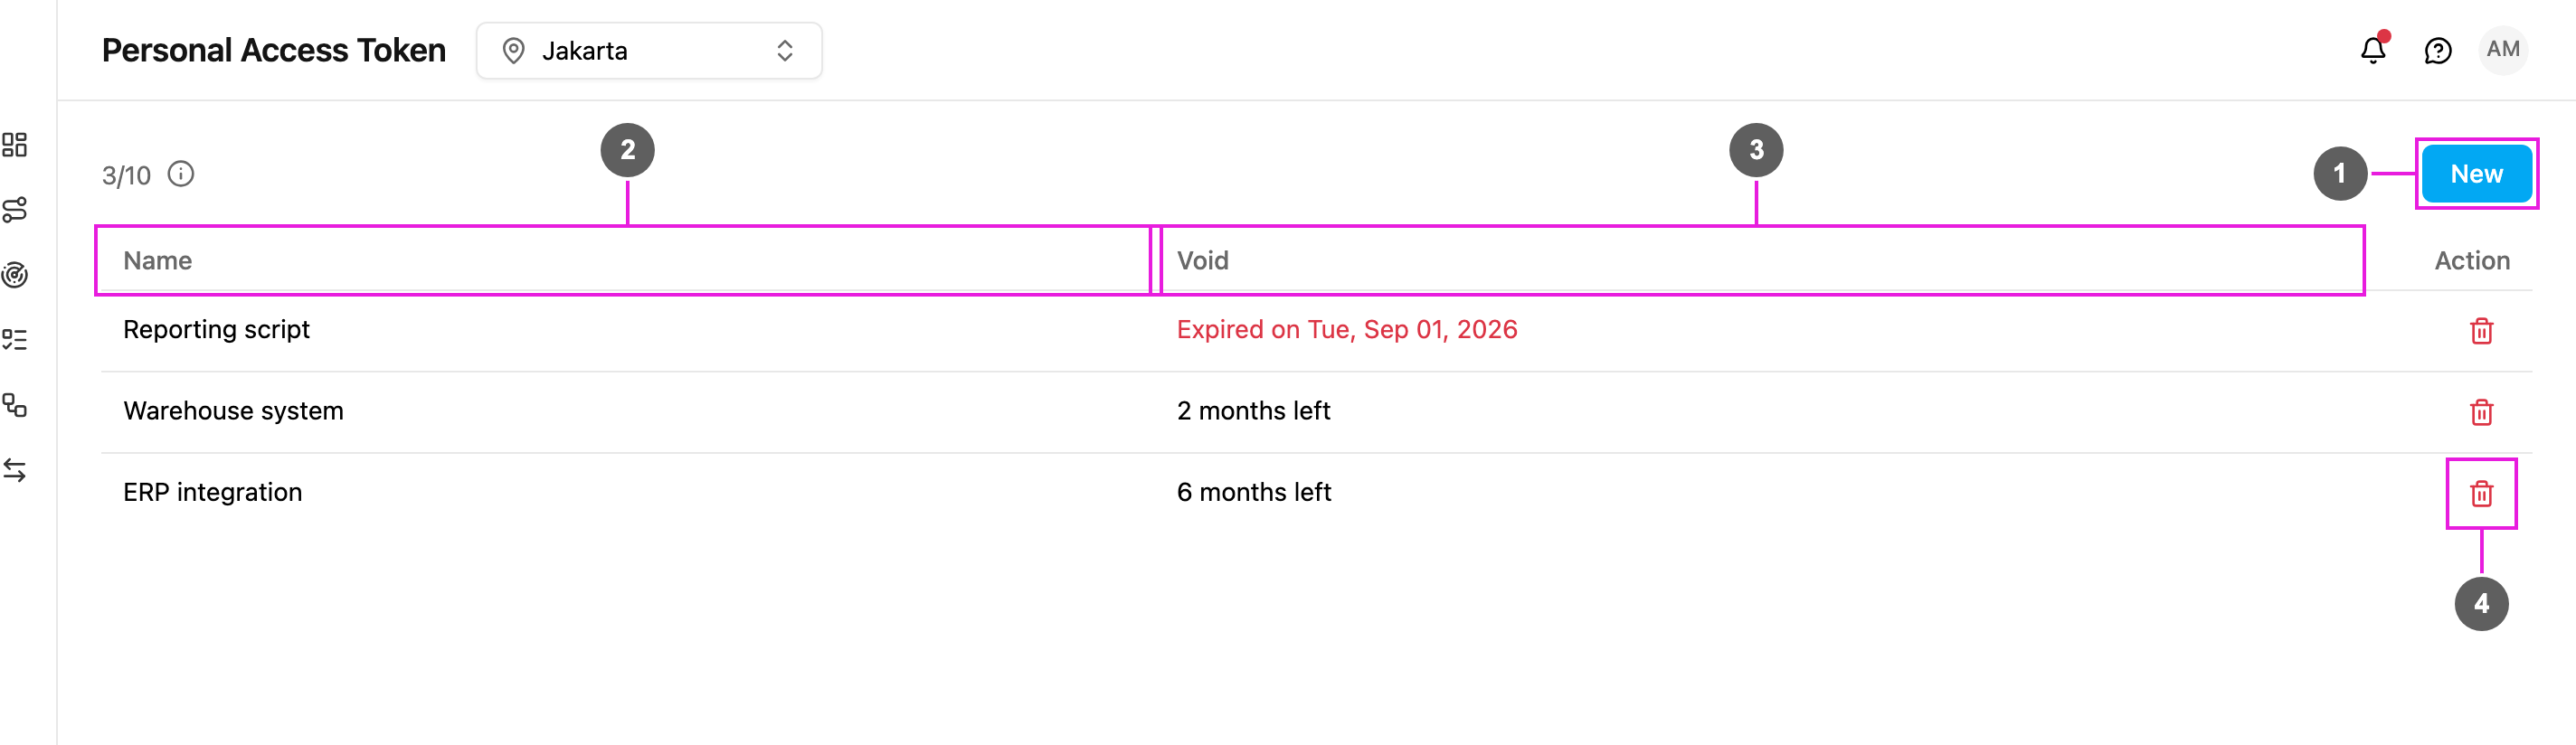
Click your initials in the top right corner, then **Access Token**. The **Personal Access Token** page opens.
1. **New**: create a token. The counter on the left shows how many of your 10 tokens you have used, for example **3/10**.
2. **Name**: what the token is for. Long names are cut off; hover to see the full name. Hover a row and click the pencil to rename the token, then press **Enter**.
3. **Void**: when the token stops working. A working token shows the time left, such as *6 months left*. An expired token shows *Expired on* and the date in red. Hover the value to see the exact date and time.
4. **Delete**: remove the token. Any system using it loses access at once. You are asked to confirm, because this can't be undone.
Tokens are sorted by expiry date, so the token that expires first is at the top.
## Create a token
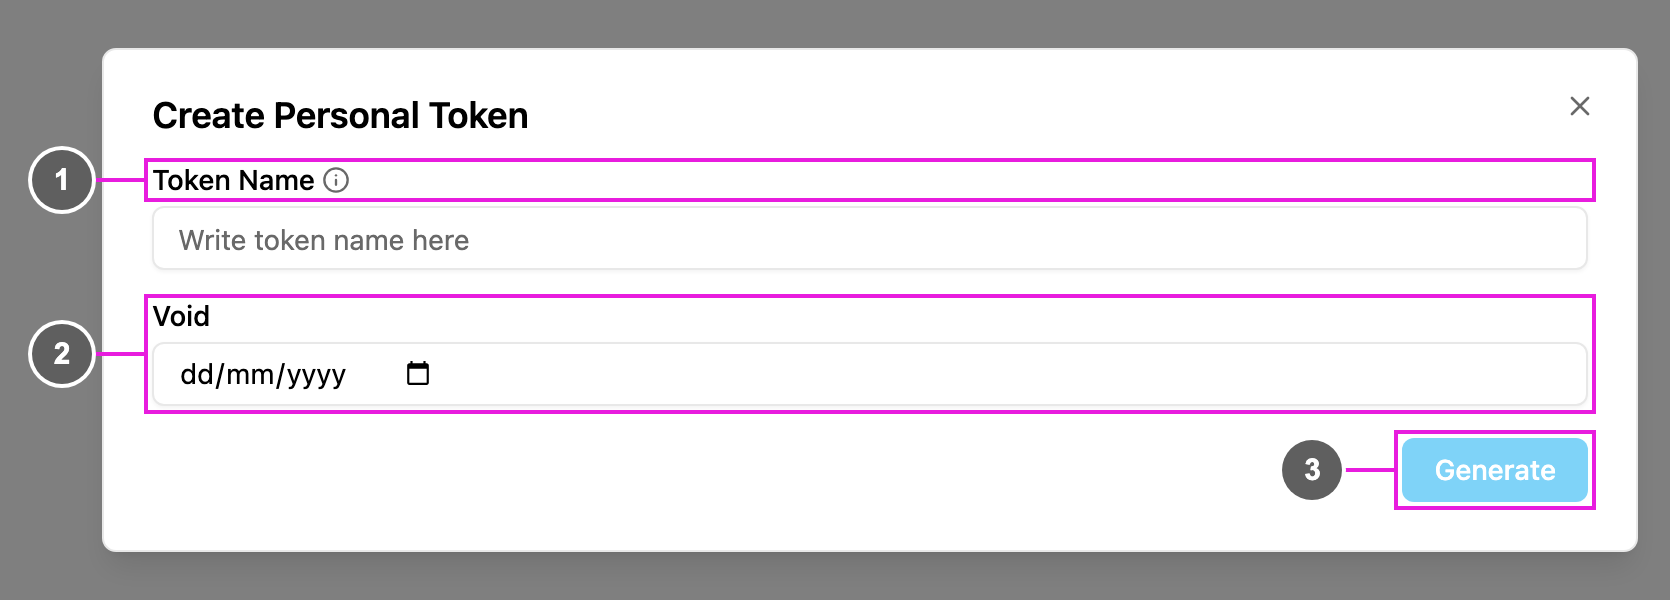
Click **New**. The **Create Personal Token** dialog opens.
1. **Token Name**: write what the token is for, for example *ERP integration*. Each token needs a different name.
2. **Void**: pick the date the token stops working. The earliest date is tomorrow.
3. **Generate**: create the token. It is greyed out until both fields are filled.
The token appears in a **Token** field in the same dialog. Click the copy button to copy it, then store it somewhere safe, such as your system's settings or a password manager.
The token is shown **only once**. Copy it before you close the dialog; you can't see it again. If you lose it, delete it and create a new one.
If you already have 10 tokens, you see *The Personal access token must not have more than 10 items.* Delete a token you no longer use first.
## Use the token
Give the token to the system that connects to the API. It sends the token with every request in the `Authorization` header, as `Bearer` followed by the token. The token has the same access as your own account, so the system can only do what your role allows.
For the endpoints, click the **?** button in the top bar and choose **API Documentation**.
## When a token expires
An expired token stops working on its expiry date and its **Void** value turns red. It stays on the list until you delete it, and it still counts toward the 10. Create a new token, update the system that used the old one, then delete the expired one.
A token works like your password. Keep it secret, never put it in an email or a shared document, and delete any token you no longer use.
This documentation is built and hosted on [Mintlify](https://mintlify.com), a developer documentation platform.